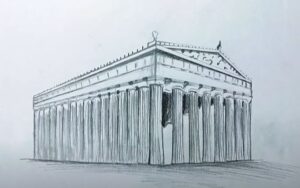
How to Draw the Parthenon with this how-to video and step by step drawing instructions. Draw along with these easy 9 drawing steps. You will learn the fundamentals for drawing Greece’s famous Parthenon temple.

Please see Parthenon drawing tutorial in the video below
You can refer to Parthenon simple step by step drawing guide below
Step 1. Draw the steps
Draw three wide rectangular strips to form the steps..
Step 2. Create columns
Start by drawing the base of the column. Next, attach the vertical shafts. Now add vertical lines to add texture to the columns. Then create the top part called the capital.
Step 3. Sketch the door
Draw a rectangular outline of a door.
Step 4. Add Frieze
Draw three horizontal rectangles to add a frieze on top of the columns.
Step 5. Create the texture of the fringe
Create the texture of the fringe by drawing a series of vertical lines.
Step 6. Attach the roof
Attach the roof by drawing a triangular outline.
Step 7. Sketch the sculpture on the pediment
Outline the pediment sculpture by drawing a wavy shape similar to the illustration.
Step 8. Add Acroterion
Sketch the acroterion mounted at the corners and center of the roof as shown.
Step 9. Complete the Parthenon drawing
Let’s add some color to complete our Parthenon drawing! First, color the steps with a light gray pencil. Next, paint the door with a dark blue pencil. Now, color the acroterion on the roof with a light orange pen. For pediment sculptures, use cream colored pencils. Then, use a light brown pen to color the wall’s background color. Shade the walls with a light brown pencil. Finally, color the roof, frieze and columns with yellow and light brown colored pencils.


