Please see hands on hips drawing tutorial in the video below
Thank you for your interest in my drawing lessons, and now I bring you a fun step by step tutorial in which you will learn how to draw hands on hips.
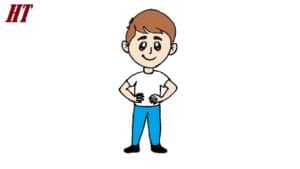
As an example, I decided to choose a picture of a boy with his hands on his hips, elbows bent and fingers resting on his stomach. Once you master this lesson, you’ll be able to draw the figure of any other person in the same position.
During the test, try to follow the sequence of steps and draw the same lines as in the example. Each step in this manual is presented and complemented by a small hint. To color the boy you can use the same colors as in the example or any other color of your choice.
Hands on hips Drawing Step by Step
Step 1. Draw the head and body.
The head is oval, the body is trapezoid.
Step 2. Add hair and ears.
Using a few smooth curves, draw the hair and add small ears.
Step 3. Describe the facial features.
Outline the eyes, eyebrows, nose and mouth.
Step 4. Add the arms.
Draw curved lines from each side to depict the skinny arms.
Step 5. Sketch the hand.
Hands slightly raised. Draw four fingers on each hand.
Step 6. Draw the legs.
Feet shoulder width apart, toes turned in opposite directions.
Step 7. Add clothes.
Using short horizontal lines, draw a t-shirt and trousers.
Step 8. Correct the inaccuracies.
Carefully remove all the extra lines in your drawing.
Step 9. Color the drawing.
At this stage, choose any color.


