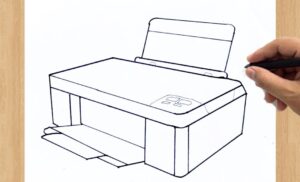
How to Draw a Printer with this how-to video and step by step drawing instructions. Sharpen a pencil and follow along with these basic 6 drawing steps. You will learn the basics for drawing a computer printer.

Please see Printer drawing tutorial in the video below
You can refer to Printer simple step by step drawing guide below
Step 1. Shape the printer body
First, draw a rectangular box to outline the printer body. Add a smaller rectangle at the top of the printer.
Step 2. Load a sheet of paper into the input tray
Load a sheet of paper into the input tray by drawing a slightly curved rectangle.
Step 3. Add a paper input tray
Next, draw a visible rectangle from behind the paper to add the paper feeder.
Step 4. Now attach the output tray
Now, draw a horizontal rectangle with slightly curved edges to outline the output hole on the printer base. Then, create a rectangular output tray attached to the bottom of the printer.
Step 5. Add buttons
Add three small buttons on the printer body.
Step 6. Complete the printer drawing
Add some colorful tones for a final touch to the printer. First, color the small buttons with cyan, magenta, and yellow. Next, fill in the paper with a white pencil. Now, color the input and output trays with a light gray pencil. After that, shade the outline of the printer’s output hole with a red pencil and the inside with a black pencil. Finally, color the printer body with dark gray.


