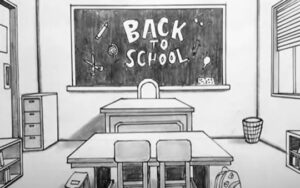
How to draw a Classroom with this how-to video and step by step drawing instructions. With 6 easy steps to follow, children will enjoy creating their own classroom scene complete with a teacher and student desks.

Please see Classroom drawing tutorial in the video below
You can refer to Classroom simple step by step drawing guide below
Step 1. Sketch the walls
Start by drawing a large rectangle to outline the walls of the classroom. Then add diagonal lines extending outward from the corners.
Step 2. Next Add a blackboard
Draw a rectangular board on the classroom wall.
Step 3. Now draw the chairs
Draw the backrests of the three chairs visible near the bottom of your paper.
Step 4. Then add the desk
Add a desk in front of each chair as shown.
Step 5. Set up a teacher’s desk
Form the rectangle of the teacher’s desk. Make sure to delete any overlapping lines.
Step 6. Complete the classroom drawing
Let’s make the classroom come alive with color! Use a green pencil to color the board. Next, color the board frame with a brown pen. Now, equip the school desks and chairs with brown tones. Then, use a yellow pencil to paint the wall. Finally, paint the floor a dull yellow and use a white pen to color the ceiling.


No Responses