How To Draw A Hurricane easy with this how-to video and step-by-step drawing instructions. Simple drawing for kids and everyone.
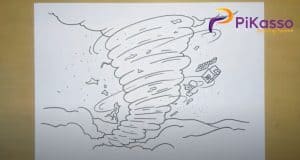
Please see the drawing tutorial in the video below
You can refer to the simple step-by-step drawing guide below
Step 1
For the first step of our tutorial on how to draw a hurricane, we’ll start where you don’t want to go when a storm hits: the base!
First, draw two curved lines with a space in between them for the ground where the storm will pass.
You can then use some simple shapes to draw some unlucky trees and houses, and for added effect you can draw them at an angle towards the center of the storm.
We’ll then use multiple curves to create swirling dust at the base of the storm, and then you can draw some lines and small debris that’s about to form.
After these details are drawn, you can move on to the next step.
Step 2 – Next, draw more storms
In this step of your storm drawing we will add more to the storm.
The first half of the storm will be quite thin and twisted, and it will be drawn with a lot of curved lines joining each other.
At the top of the section that we will draw now, you can add some larger curves to make the structure of the storm look more erratic.
Then you’ll be ready to move on to step 3!
Step 3 – Now draw the sequel to the storm
Continuing with this tutorial on how to draw a storm, you can now draw the sequel.
At this point, the body of the storm will begin to thicken slightly as it moves upward. It will also begin to twist sharply to the left, as shown in our reference image.
By twisting it to the left, you can start pointing it to the sky, but we’ll draw that part later.
Be sure to also incorporate some curves, open at the beginning of this section, and then we’ll be ready to draw more sections into that empty space later in this tutorial.
Step 4 – Next, draw some clouds above the storm
For this fourth step of the storm drawing tutorial, we’ll move the focus away from the storm itself and draw clouds gathering above the storm.
To draw these clouds, you can use lots of bumpy lines to create puffy clouds. You’ll want to use a lot of these little bumpy lines to make the cloud overlay look a little more intense.
You can also then draw some longer curves for the area where the storm will connect with the cloud cover.
Then you’ll be ready to add the final details and elements in the next step, so go ahead!
Step 5 – Add Final Details to Your Storm Drawing
You have now reached the fifth step of this tutorial on how to draw a storm. In this step, we’ll finalize the details and the final part so you’re ready for the final step of the tutorial.
To do this, you will draw the last part of the storm. This part will be drawn with more wavy lines that you drew between the clouds in the previous step.
Once you’ve finished drawing the final part of the storm, you’re ready for the final part!
Before continuing, you can also add some details of your own. These details can include some debris flying around, or you can add some more debris to the background of the image.
These are just a few ideas, but what more can you think of to add?
Step 6 – Finish your storm drawing with color
For the final part of the storm drawing, you can perfect it by adding some color to it. In our reference image, you’ll see just one of the many ways you can color this image!
We used various shades of gray for the storm itself, and then we used a blue gradient for the sky behind it.
Then we finished with some green so the grass added some brighter colors.
You can choose the same colors in this drawing on your own, but there are many other colors you can choose as well!
Once you know what colors you want to use, what tools and artistic mediums do you think you will use to achieve them? We can’t wait to see!
Your Storm drawing is done!
That brings you to the end of our tutorial on how to draw a hurricane!
You certainly won’t want to stay when one of these storms hits in real life, but we hope it’s a fun experience for you as you learn how to draw one!
Once you’ve completed all of these steps, you can also add some of your own ideas to really personalize the image.
We’ve covered a few ideas you can try, but what else can you think of to complete this picture?
You can also check out our website when you’re ready for more drawing fun, as we have plenty of tutorials ready for you there! We also have more tutorials coming soon, so stay tuned for those.
Also remember to share your finished storm drawing on our Facebook and Pinterest pages. That would be the best way for us to see!
