How To Draw A Mummy easy with this how-to video and step-by-step drawing instructions. Easy drawing tutorial for beginners and everyone.
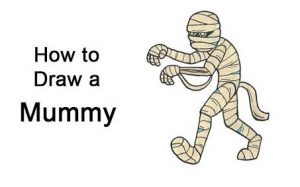
Please see the drawing tutorial in the video below
You can refer to the simple step-by-step drawing guide below
Step 1
To start this mummy drawing tutorial, we’ll start with the head first.
Mummies are usually wrapped in multiple strips of fabric, and so we’ll be drawing a lot of these throughout this tutorial.
Use some curved lines to draw the head of the mummy covered in these thin strips, but remember to leave the bottom half of the face open.
We will also leave some space on the cloth near the eyes and they will be drawn as two empty circles.
Then draw the nasal cavity and add a mouth with teeth underneath. Finally, use some more rounded lines to draw a patterned outfit that covers the mummy’s shoulders.
Step 2 – Now draw the first arm for your mummy in this step
In the second part of your drawing of the mummy, we will draw the first arm for the monster. Before you start drawing the details for this arm, you can use a pencil to draw the general outline of this arm on the left side.
Once you’ve drawn that outline, you can use a darker pen or pencil to draw strips of fabric wrapped around it.
There will also be a small bracelet on the wrist that you can draw with some smooth lines. Then it’s time to move on to step 3 of the tutorial!
Step 3 – Next, draw the other arm and some sides of the chest
For this step of the mummy drawing tutorial, we’ll be adding the other arm along with starting to draw the mummy’s chest.
First, for this second branch, you can use a method similar to the one you used for the previous branch, as one will be positioned very similarly to the other.
Then we will draw the chest for the mummy.
Like many other parts of the mummy, this body part will be painted with lots of thin strips of cloth.
You can also draw the outline with a pencil first and then rewrite it with a pen to add more details to this part.
Step 4 – Now draw the legs and the first skirt
Continuing with this drawing of the mummy, we will now add the first leg along with the dress-like outfit it is wearing.
We’ll start with that, and it’ll have a belt made up of several small rectangles on top of it.
Then we’ll draw the skirt with some solid, slightly curved lines for the hem. It will also have some lines on the inside that make it look slightly stitched.
Finally, we will draw the first leg for the mummy. Again, you can draw a contour with a pencil and then draw fabric details over these to make it easier for you.
Once you’ve drawn these aspects, we’ll be ready for some final details in the next step!
Step 5 – Add the final details to your mummy drawing
Now you’re ready to finalize the final elements of the painting in this step of our mummy drawing tutorial.
This will get you ready for the final step where you will color your picture. First, we’ll add another leg for the mummy.
Simply draw one leg the same way you drew the other, then you can add some other smaller details.
Before moving on to the final step, be sure to add any background details you might want! Maybe you could draw some pyramids or a desert in the background for some ideas.
What else can you think of to complete this mummy?
Step 6 – Complete your mummy drawing with color
In the final step of painting the mummy, you can finish it off with several colors. In our reference image, we used light brown and beige colors for the fabric packs.
We then used a darker brown for the middle areas and incorporated yellow and blue for the rest of the clothes it was wearing.
There are a lot of smaller areas to color in in this image, so you may want to use a medium that helps you add precision like crayons or a fine brush.
What colors and art mediums do you think best go with this scary drawing? We will be interested to see what you choose!
Your mummy drawing is done!
You have completed all the steps in this how to draw mummy tutorial! We hope this tutorial has helped ensure that completing this drawing isn’t as intimidating as exactly mummy!
As long as you follow all the steps then you will definitely do a great job with it.
Once you’ve finished this picture, be sure to add any additional ideas or elements you’d like to it! What can you think to personalize the image even more?
Be sure to visit our site when you’re ready for more drawing fun. We have a ton of tutorials available and more are coming soon!
We hope that you will also share your finished mummy drawing on our Facebook and Pinterest pages for us to admire!
