How to draw a Hammer easy with this how-to video and step-by-step drawing instructions. Simple drawing for kids and evryone.
Please see the drawing tutorial in the video below
You can refer to the simple step-by-step drawing guide below
Step 1
For this first step of the tutorial on how to draw a hammer, we’ll start with the tip of the hammer, arguably the most important part.
One side of the head has a flat ‘face’ of the hammer that takes care of the actual hammering. At the other end are curved claws that can be used to pull out nails among other purposes.
We will start both of these aspects in the first step of this tutorial. The hammer face has a thin base that moves beyond the wider surface of the face.
This surface will also be slightly curved, and it will also have a border close to the surface.
You can then draw the top of the body for the hammer, and then finish using some curved lines extending back for the base of the hammer.
Step 2 – Draw some more hammer heads
Continuing with this hammer drawing, we’ll add some details to the hammer’s head. First, use some more curved lines to draw the second half of the claw for the tip.
The angle of the hammer will make it possible to see the flatter underside of this claw, as shown in our reference image.
Then use some more curves for the base of the hammer head and then you can use a long line for the start of the right hand side of the handle. Then it’s time to move on to step 3 of the tutorial!
Step 3 – Now draw the rest of the handle
In this third step of our hammer drawing tutorial, you’ll see you complete the handle outline for the hammer. First, draw a fairly flat oval for the base of the handle directly below.
Then we’ll use another long curved line moving from that oval up towards the top of the hammer.
The handle of the hammer has a rather specific shape to it, so do your best to recreate it as shown in our reference image.
Once that’s done, we’ll start adding some texture details as we move on.
Step 4 – Next, draw the texture details for the hammer’s handle
Hammer handles are usually made of wood and we’ll add some texture to show this off in this fourth step of your hammer drawing.
To create the effect of wood grain, we will build layers of patterns on the wooden handle. Start by drawing a long, thin shape with pointed ends near the center of the handle.
Then surround the shape with enlarged versions of the shape around it. Now draw three of these shapes with a thick line in the center of the first one.
We can then move on to step 5 which will finalize the grain pattern along with any final details.
Step 5 – Add the final details to your hammer drawing
We’ll be finishing up the texture details and every final stroke in this step of the hammer drawing tutorial.
To complete the wood grain effect of the handle, we will draw more curves on the handle around the shapes you drew in the previous step.
Most of them will have a fairly smooth curve to them, but some closer to the origin will have a sharper shape to them.
Once you’ve added the wood grain details, you can add other details of your own!
One idea is to get rid of the wood grain effects and instead paint a rubber sleeve effect on the handle.
You can also draw a background to indicate which project this hammer is being used in. What can you think to end it?
Step 6 – Complete your hammer drawing with color
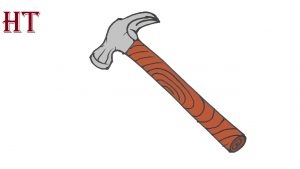
This is the final step of your hammer drawing, and in it we’ll finish with some color. In our reference image, we kept the colors a bit more realistic.
We used brown for the wooden handle, and then we used some gray for the metal end of the hammer.
You can use colors that are similar to these, but don’t be afraid to use some of your own unique color choices!
Once you’ve decided on the colors, you can then choose the art media and tools you’ll use to pull them out. We can’t wait to see what you choose!
Your hammer drawing is done!
You have completed all 6 steps of this hammer drawing tutorial and you have a great description of this useful tool!
We hope that by working through this tutorial, you found it a fun and easy experience to draw this hammer.
Don’t forget that you can add details, background ideas, and other elements you want to perfect.
Then you can find more great drawing tutorials on our website to enjoy. Be sure to stay subscribed, as we’ll soon have some more you won’t want to miss!
We’d love to see your finished hammer drawing, and you can show it to us by sharing your work on our Facebook and Pinterest pages.
