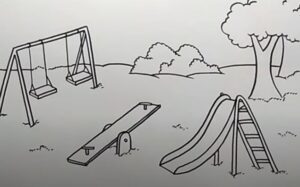
Playground Drawing with this how-to video and step by step drawing instructions. Beginners and all can learn how to draw a playground by following the images in this basic guide.

Please see Playground drawing tutorial in the video below
You can refer to Playground simple step by step drawing guide below
Step 1. Shape the beam of the seesaw
Start by drawing a thin rectangular board to form the rocking beam. Then, attach the handle near the top of the beam.
Step 2. Draw the base of the seesaw
Now, draw two U-shaped lines on each side of the beam as shown. Add a small circle to outline the screw. Make sure to remove the parts of the rocking beam that overlap the base.
Step 3. Sketch the swing frame
Create a thin outline of the swing frame.
Step 4. Attach the swing seat
First, draw the rectangle of the chair. Then, attach the seat to the swing frame by drawing vertical lines.
Step 5. Start drawing a slide
Let’s add a slide to our playground by drawing a thin curved shape.
Step 6. Create the center of the slide
Form the center of the slide by drawing a wavy line.
Step 7. Create the other side of the slide
Draw a wavy line as shown to form the other side of the slide.
Step 8. Draw the sliding scale
Form horizontal bars to attach sliding ladders.
Step 9. Complete the playground drawing
Let’s add some color to our fun playground! First, use a blue pen to color the swing frame and the middle part of the slide. Next, use a red pen to shade the edges of the slide and rocker legs. Now, use a yellow pencil to color the rocking chair, sliding scale, handle, and screws to the seesaw. Then, use a brown pen to color the seesaw bar and rope on the swing. Finally, use a light gray pencil to add some shadow. You can also add patches of grass using a green pencil.


