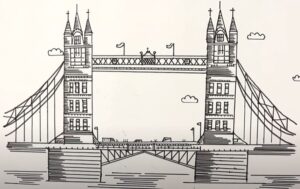
How to Draw Tower Bridge with this how-to video and step by step drawing instructions. Expect 9 easy steps to follow, kids will enjoy creating their own Tower Bridge on paper. Also included is a printable version of this famous bridge of London.

Please see Tower Bridge drawing tutorial in the video below
You can refer to Tower Bridge simple step by step drawing guide below
Step 1. Form the base
First, sketch the rectangular base of the Tower Bridge’s towers. Add thinner rectangles with space in between to form the tower’s decorative beams.
Step 2. Draw the walls of the tower
Draw vertical lines connecting the base to outline the tower walls.
Step 3. Add Windows
Add arched windows on the towers.
Step 4. Attach the roofs of the towers
Attach three triangles to the top of the tower to form the roof.
Step 5. Form the walkway
Draw two horizontal strips with a zigzag line between them to form the walkway.
Step 6. Attach the deck
Now, form a thin horizontal strip connecting the base of the tower. Then add a curved line below the deck in between the two towers as shown.
Step 7. Sketch the hanging chain
Forms the curved outline of the hanging chain connecting the towers.
Step 8. Add support beams
Draw vertical bars to form support beams below the hanging chain.
Step 9. Complete the tower bridge drawing
Let’s add some color to our Tower Bridge drawing! First, fill in the roofs of the towers, hanging ropes, and walkway beams with a vibrant blue pencil. Next, color the base of the towers with a brown pencil and the walls of the towers with a light orange pencil. Now, shade the support beams with a gray pencil. Then, use cream colored pencils to color the deck.


