How to Draw Christ the Redeemer with this how-to video and step by step drawing instructions. There are 6 easy steps to follow, children will enjoy drawing their own version of the famous statue: Christ the Redeemer on paper. Also included is a printable version of this drawing lesson.
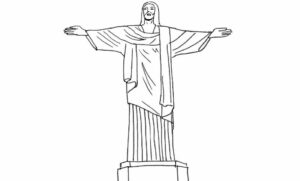
Please see Christ the Redeemer drawing tutorial in the video below
Christ the Redeemer Drawing Step by Step
Step 1. Draw the head
First, draw an oval for Jesus’ head. Next, create a small curve on either side of the head to add the ears. Now add a long curved line around Jesus’ head to outline His long hair. Then, draw the shape of the neck attached to the lower part of the head.
Step 2. Sketch the scarf
Sketch the curved shape of the scarf. Then, form the two ends of the scarf by drawing two rectangles.
Step 3. Add folds
Draw short lines following the shape of the scarf to add some folds and texture.
Step 4. Add arms and body
First, draw the rectangle of the sleeve connecting to the scarf. Next, create the oval outline of Jesus’ hand near the end of the sleeve. Now, create the elongated hem of the gown. Then, add pleats near the bottom of the gown by drawing vertical lines as shown.
Step 5. Attach the base
Draw two overlapping rectangular strips to form the base of the statue. Then add four diagonal lines to outline the pedestal.
Step 6. Complete the drawing of Christ the Redeemer
It’s time to add some color to our painting of Christ the Redeemer! First, use shades of blue to color the Christ the Redeemer statue. Next, color the rectangular base of the statue with a light gray pencil. Now, shade the pedestal with a brown pencil.
