How To Draw The Golden Gate Bridge easy with this how-to video and step-by-step drawing instructions. Pencil drawing tutorials for beginners and everyone.
Please see the drawing tutorial in the video below
You can refer to the simple step-by-step drawing guide below
Step 1
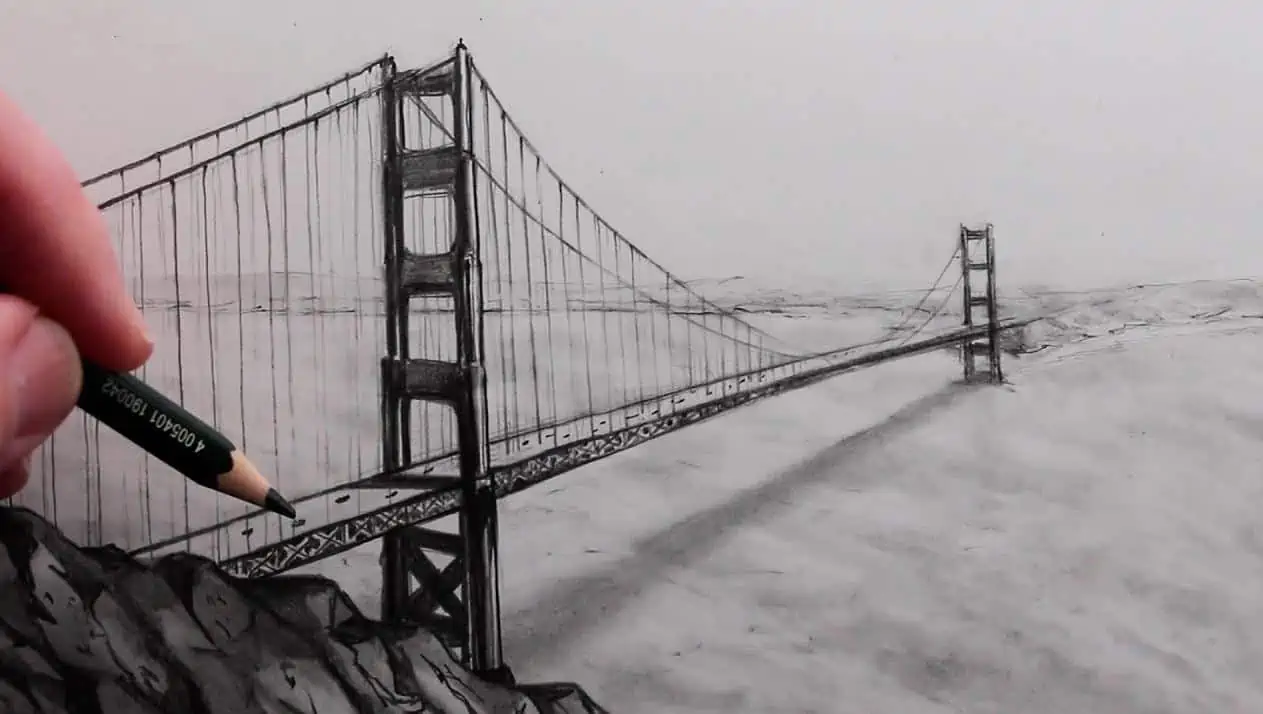
One of the distinguishing features of this landmark is the wiring and cables that run above it, connecting to the bridge itself.
We will start this tutorial on how to draw the Golden Gate Bridge by starting these lines for the cables.
The cables that we will draw first will be the ones running above the bridge that the warp cables will connect to.
They will need to be drawn quite specifically to make them look accurate, so do your best to locate and draw them exactly as they appear in our reference image.
We’ll use some curves to give them the famous loop shape they have in real life.
Step 2 – Now draw the starting point of the bridge
Now that you have drawn the cables of the bridge, you can now start drawing the bridge itself. This will be drawn with some slightly curved horizontal lines, all of which will be pretty close together.
These lines will also converge at a single point on the right hand side of the bridge.
When drawing, use a reference image to see if you should leave some small space in the bridge, as this will be where the pillars of the bridge will go later.
We’ll start drawing these pillars in the next step of the tutorial, so when you’re ready, we’ll move on!
Step 3 – Draw the pillars of the bridge
We covered the buttresses of the bridge in the last step of the Golden Gate Bridge tutorial and in this section we will draw them.
The pillars are made up of several sections that have horizontal sections with spaces in between them.
Each section gets smaller than the last as you move up. Then the pillars at the far end of the bridge will be drawn with much less detail.
Add some more details to the bridge and then we can move on to step 4!
Step 4 – Next, draw the cables for the bridge
Now we will draw the cables for this Golden Gate Bridge drawing. First, use some curves for some rocks on the left side of the bridge.
Then use a ruler to draw some thin vertical lines inside the first part of the bridge. The second part will have more cables in the next step of the tutorial!
Step 5 – Add Final Details to your Golden Gate Bridge drawing
To complete this picture before the final step, we will add some details and final strokes in this step of the Golden Gate Bridge tutorial.
To do this, we will add more vertical lines along the last part of the bridge. Just continue drawing these lines as you started in the previous step to complete the cable.
Then we will draw some ripples on the ocean to make it look like there are some small waves on the surface.
After these details are drawn, you can add some details and ideas of your own!
They can include weather details like clouds or rain, or it can be something like a cloud in the background.
These are just a few examples of what you can do to get it done, but what else can you think of to add your own details and accents to it?
Step 6 – Finish your Golden Gate Bridge drawing in color
This famous bridge is famous for its bright red color, and this is what we did in our example image.
If you’d like your own Golden Gate Bridge drawing to be color accurate to life, then you can use our reference images to guide you as you color!
When adding color to an image, choosing a color is only part of the process.
Deciding which art medium one will use is a whole new challenge and for this we recommend using media that allow for more precision.
Examples of this would be crayons, pencils, or fine-tipped brushes. These types of media would be very helpful to get in there for finer details, but what would you use for this image?
Your Golden Gate Bridge drawing is done!
This is truly one of the most famous bridges in the world, and we hope you had a great time recreating it in this Golden Gate Bridge tutorial!
When recreating a landmark in real life, it can be a bit difficult to accurately represent all the features and details and we hope that this guide made it easy and enjoyable for you.
Now that you’ve finished the drawing, you can continue the fun with your own additions.
Are you going to paint the background, add some weather effects or maybe have fun with colors and art mediums to put your own spin on it?
If you had a great time working with this tutorial, you’ll probably find your next great drawing tutorial on our site!
We have a huge selection of tutorials for you, always getting bigger, so be sure to stay subscribed.


