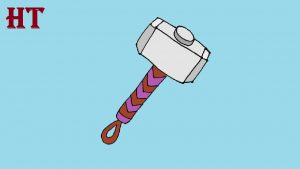
How to draw thor hammer easy with this how-to video and step-by-step drawing instructions. Easy drawing tutorial for beginners and kids.

Please see the drawing tutorial in the video below
You can refer to the simple step-by-step drawing guide below
Step 1
Start by drawing a diagonal, inclined rectangle. This forms the cheek, or side, of the hammer head. From the top corners of the rectangle, stretch two short lines. Connect them with a straight line. This forms the top of the hammer, giving it a three-dimensional shape.
Step 2
Draw short lines extending from all three corners on one side of the hammer. Connect them using straight lines. This forms one of the two sides of the hammer.
Step 3
Extend short straight lines from all three corners on the opposite side of the hammer. Connect them using lines, forming the second side of the hammer.
Step 4
To create a hammer eye, draw an oval that overlaps the hammer head. Draw a short, descending line from each end of the oval. Connect these lines with a curve.
Step 5
Remove the guides from the hammer.
Step 6
Draw two straight, long, parallel lines going down from the hammer. Connect them at the bottom with a short curve. This forms the handle of the hammer.
Step 7
Decorative and detailed handle of the hammer. Draw a curve over the handle near the tip. Then, tape the handle with “V” shaped lines from the top to the top of the hammer.
Step 8
Draw the loop at the bottom of the handle. Start by drawing a water drop shape.
Step 9
Draw a smaller waterdrop shape in the first image, completing the loop.
Step 10
Thor’s hammer color.


