How to Draw Ken Kaneki by Pencil with this how-to video and step-by-step drawing instructions. Anime Boy Drawing tutorial for beginners and everyone.
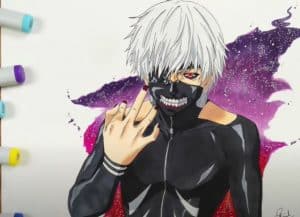
Please see the drawing tutorial in the video below
You can refer to the simple step-by-step drawing guide below
Step 1
This first step is nothing particularly different from the first steps of learning to draw other people or characters. As you may know, in the beginning of all our tutorials we draw a stickman. Due to the fact that we draw anime characters, his head is a bit larger than the head of a normal man. Elsewhere, we draw an ordinary stickman – first outlining the head with an oval shape, then the skeleton of the body with normal lines.
Step 2
In this step we first mark the two cross sections of the face. Below the face we draw the neck – a noticeably long cylinder. Below this cylinder we outline the body, guided by the lines from the first step. Also, at this step, we draw the contours of the arm in the form of an oblong cylinder and outline the hand.
The lower body draws an inverted triangle. The right leg is drawn to resemble an arm – in the shape of an oblong cylinder. And the final step of this step is to outline the foot.
Step 3
This will be the final step in working with basic Ken Kaneki lines and drawings. With the help of circles and short lines, we draw eyes, nose, ears, and mouth in the anime. A circle represents the contours of the hair. Also, in step number three, we will draw approximate contours on Ken Kaneki’s clothes. So the basics of our anime character drawings are done, and starting from step 4, we are going to work we will draw the character in detail.
Step 4
In this step we will draw the face. You can read this article on how to draw anime face step by step. It will make your drawing process more comfortable. In summary, first and foremost here we will carefully draw out facial contours and facial features using dark and clear lines. At the end of this step we just need to remove the guides from the face and head in general.
Step 5
This is a good time to start working with the final trunk lines. First, we draw a semicircle below the collar. Then, draw another semicircle, located near the edge of the rib. At the end of this step, we add simple lines to get the result like in our sample.
Step 6
We have one last tough moment in this lesson. In this step we will draw the arms. We draw wide, short sleeves and thin arms. You should emphasize the contrast between wide sleeves and thin sleeves. This article on how to draw hands will help you draw your fist correctly.
Step 7
In this step we add details to Ken Kaneki’s leg. So we add some creases and decorative lines to our anime character’s shorts. Then you can add some creases on Ken Kaneki’s boots. Don’t forget to delete all the extra lines we drew in the first three steps.
Step 8
And we have the final step in which we are going to draw the shadows. It makes the drawing of Ken Kaneki look more massive and realistic. Let’s first define the light source to add shadow to the area with the least amount of light. All shadows should be drawn with dense hatching. The second layer of hatching will make your shadow darker, and blooming in different directions will make them more natural.
It’s a drawing tutorial in which we show how to draw Ken Kaneki from a very popular anime called Tokyo Ghoul. You can also slightly change the look of Ken Kaneki by changing his skin or appearance. By the way, if you’ve seen our other drawing lessons on manga and anime characters, then chances are you’ll notice how similar they are drawn. So you can rest assured to use the skills you learned in this drawing tutorial to draw any other anime character. The first three steps are the same in all characters, the difference being mainly in the details. You can also enhance this character-specific drawing skill by drawing him in different poses, different outfits, and different perspectives. We will be creating more anime sketch tutorials in the coming days. Please don’t forget to comment on it if you like it
