How to draw a holly leaf with this how-to video and step-by-step drawing instructions. Easy drawing tutorial for beginners and kids.

Please see holly leaf drawing tutorial in the video below
This tutorial will show you how to draw a holly leaf. I’m sure this lesson will be useful to any aspiring artist.
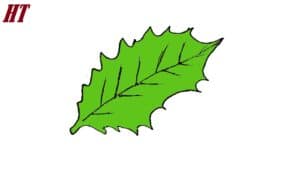
I suggest you complete a new interesting lesson in which you will learn how to draw a holly leaf. Holly is a small evergreen pointed-leaved shrub.
The holly leaf is easy to recognize because it has jagged edges. As you can see, there are small spines along the entire outer edge of the leaf.
This is a beautiful plant that can be grown as an ornamental in the backyard. In addition, holly leaves are used as a festive attribute to decorate rooms, festive tables or as one of the elements of a Christmas wreath.
Holly leaf Drawing Step by Step
Step 1. Draw the center of the sheet.
Size your drawing and draw a straight line.
Step 2. Describe the short stem.
On one side, draw a small rectangular trunk.
Step 3. Add details.
Draw smooth circles on each side.
Step 4. Outline the spikes on one side.
Describe consecutive spikes of different sizes along the outer edge.
Step 5. Add spikes on the other side.
Repeat the previous step and draw the same spikes on the other side.
Step 6. Sketch the vein.
Using thin lines, draw veins on the surface of the leaf.
Step 7. Correct the inaccuracies.
Carefully remove all auxiliary lines.
Step 8. Color the holly leaves.
In this step you will need the green color.


