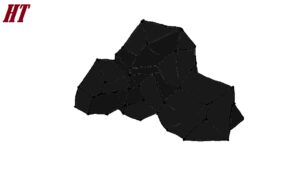
Please see Charcoal drawing tutorial in the video below
Now you will learn how to draw charcoal. Coal is a combustible solid that is used in many different fields – both in everyday life and in industry.
You will complete this lesson very quickly and easily. The main feature of this tutorial is that free-form lines are allowed here. You don’t need to repeat all the lines exactly like in the example. You just need to memorize the sequence of steps and correctly color the finished drawing.
The acquired skills will be useful to you in the future when you want to draw some elements of nature, such as mountain landscapes. If you notice, charcoal is very similar to any stone, so you can easily draw any stone object if you learn how to draw charcoal.
Charcoal Drawing Step by STep
Step 1. Draw the outline.
Determine the size and position of the charcoal and draw the outline.
Step 2. Mark the coal separately.
Draw a jagged line in the center of the border.
Step 3. Highlight the next section.
Using a few jagged lines, draw a separate piece of charcoal on the left side.
Step 4. Draw two small pieces of charcoal.
Using serrated lines, draw two small pieces of charcoal at the bottom.
Step 5. Add the outline of the top coal.
Sketch some straight lines as shown in the example.
Step 6. Detail the highest piece of coal.
Draw some jagged lines in random order.
Step 7. Detail the remaining coal.
Sketch some more freehand lines.
Step 8. Add details.
Draw a few more lines.
Step 9. Color the drawing.
Use a few shades of gray to show off the charcoal highlights.
You can see more drawing:


