How to Draw a Pom Pom with this how-to video and step-by-step drawing instructions. This lesson will be very simple and you will quickly complete this task.

Please see Pom Pom drawing tutorial in the video below
This is a simple step by step tutorial that will show you how to draw a cotton ball. Any beginner can easily cope with this task since the simplest elements are used here. This lesson is suitable for any child and aspiring artists.
A pom-pom is a ball made of wool, cotton, or silk. Surely you have seen such pom poms more than once, used as decorations on clothes, hats, sandals.
There are also large cotton balls worn on the arm and used in jumps to assist athletes in team games and competitions. Pom poms can come in many different sizes and colors.
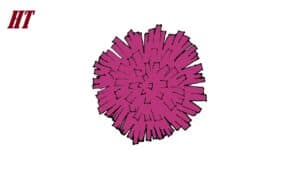
This image shows a small cotton ball that can be used as a decoration on clothes. You can color the cotton the same color as in the example or use any other color of your choice, or you can use several different shades and make the cotton balls colorful.
Pom Pom Drawing Step by Step
Step 1. Draw the outer contour.
Specify the size of the pom pom and describe a circle.
Step 2. Draw thread lines along the outer edge.
Draw thin lines from the outer border to the center of the cotton ball.
Step 3. Add the next subject row.
Draw long thin lines closer to the center. Draw the ends of the threads with short lines.
Step 4. Outline the next row of threads.
Near the center consistently draw short thin strokes.
Step 5. Add in the center of the cotton ball.
Draw thin, short lines in the center of the cotton.
Step 6. Describe the topic.
Draw thin lines along the outer contour.
Step 7. Add the subject headers.
Draw the ends of the threads along the outer edge using short lines.
Step 8. Color the cotton ball.
Use pink or any other color you like.


No Responses