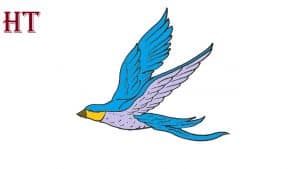
How to Draw A Flying Bird easy with this how-to video and step-by-step drawing instructions. Bird drawing tutorial for beginners and kids.
Please see the drawing tutorial in the video below
You can refer to the simple step-by-step drawing guide below
Step 1
In the first step of the tutorial on how to draw a flying bird, we will use a pencil to draw some rough outlines for the bird.
The lines and shapes will be pretty basic for now, as we’ll be adding more details in the later steps of this tutorial. For the outline now, you will draw the head, body, wings and tail.
Then, once you have all these pencil outlines, you can use the pen to draw on the bird’s face and beak.
While doing this, you can also draw some elements like eyes and mouth on the beak. When you’re happy with how it looks, you’re ready for step 2!
Step 2 – Start drawing some more pen details
The second part of your drawing of the bird in flight will see you add some pen line detail to your bird.
For this part we will focus on some lines on the wings and some of the body. Now you can see the last line of the bird.
You can also go over the bird’s tail while adding some finer details as you go along.
Step 3 – Start adding feather details to the wings
In this third part of our tutorial on how to draw a flying bird, we will finalize the outline of the bird.
For the most part, you will focus on the feather tips of the wings. To do this, you can use some sharp jagged lines along the wings. This will make it look like beautiful wings and feathers!
Step 4 – Draw some more details inside the wing
Your sketch of the bird in flight is pretty much done now, so in the next few steps we’ll draw some details on the inside of the wings.
Using the pencil lines that you created in step 1, carefully draw some sharp feather lines along the inner line of the wing.
This will really help give the image some texture. After you’ve drawn, you’re ready for the final details in the next step.
Step 5 – Finalize the final details of your flying bird drawing
This step of our flying bird tutorial will be about adding some final details to really complete it.
These details will mainly appear on the wings, you can add feather details there.
You can then add any final pen lines that you may have missed from the previous steps.
Once you have drawn all the pen details that you want for your image, you can erase all the pencil lines from the first step because you won’t need them anymore.
When you erase, use caution as the ink can take a while to dry completely! Once all these details have been added, you can also add any other elements or details you want.
Some ideas you could include is having some other bird fly with this one. You can also draw a lovely background to really complete it in a unique way!
By drawing the background, you can tell what kind of weather or terrain conditions this bird is flying through.
You can also search for pictures of different landscapes as inspiration for some backgrounds that you can draw!
How would you put your own spin on this image before the last step?
Step 6 – Finish your flying bird drawing with some colors
Now that you’ve finished your flying bird painting, it’s time to relax with some fun coloring to really finish it off! In our example, we use blue, gray, and yellow to color the bird.
When you are coloring in your own canvas, you are free to use any color you want for it!
Birds can come in all sorts of bright and beautiful colors, so you have plenty of options for how to perfect it.
You can keep the colors muted and darker if you like, or you can make it bright and vibrant with colors that bounce off the page!
If you have drawn the background or any additional elements then you can also colorize them for more color variations.
Then, once you know what colors you want to use, you can choose the art media and tools you want to use.
You can combine tools like paints, watercolors, and crayons to name a few, and each will bring a wonderful element to the board.
