How to Draw Happy Birthday in Bubble Letters easy with this how-to video and step-by-step drawing instructions. Easy drawing tutorial for beginners and kids.
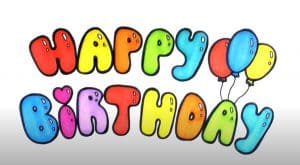
Please see the drawing tutorial in the video below
You can refer to the simple step-by-step drawing guide below
Step 1
Use the curves to outline the letter “H.” Draw elongated ovals to form the edges of the letter, connected by curves that form a part of the oval.
Step 2
Draw an upside down heart shape for the letter “A.” Surrounds a small circle inside it. Use one curve for the body of the letter “P” and another curve for the upper part. Draw a small circle in the middle.
Step 3
Draw another letter “P” like the first letter. Then use the curves to outline the letter “Y.”
Step 4
Draw the letter “B” using a long curve overlapping one side. Draw a small circle on the top and bottom. For the letter “I”, use a curve to surround a circle.
Step 5
Sketch the letter “R” using three curves – one for the trunk, one for the top and one for the legs. Draw a small oval in the upper part. Use two curves for the letter “T”, one for the trunk and one for the crossbar.
Step 6
Draw the letter “H” like you did before. Use one curve for each side, connected by two curves. For the letter “D”, draw a circle with one side missing. Draw a small oval in the center.
Step 7
Draw an inverted heart with a small inner circle for the letter “A” and use the curves to outline the letter “Y.”
Step 8
Draw some bubbles below the message. Draw some circles or ovals. Underneath each one, use a number of “U” shaped lines to surround an unusual scallop shape. Then draw a wavy line to indicate the series.
Step 9
Draw a party hat over the letter “Y”, erase it as needed. First, draw a triangle with a rounded base line. Use the curves to surround an irregular shape above and wrap the hat with diagonal curves.
Step 10
Color your animated messages.
