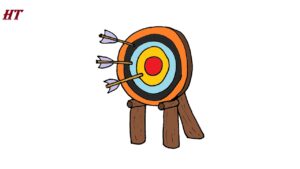
How to Draw Archery with this how-to video and step-by-step drawing instructions. Easy sports drawings tutorial for beginners and everyone.

Please see Archery drawing tutorial in the video below
You can refer to Archery simple step-by-step drawing guide below
Step 1. Establish a Target Board
First, create the circular border of the target panel.
Step 2. Sketch the target face
Next, outline the target face by drawing four evenly spaced circles.
Step 3. Add support beams
Add short cylindrical support beams below the target board. Make sure to delete any overlapping lines.
Step 4. Attach the legs of the target board
Attach three long legs below the goal board. Then, create small dots and wavy lines to add some texture.
Step 5. Draw arrows
Draw thin cylindrical arrows glued to the surface of the target board. Then add feathers near the end of each arrow.
Step 6. Complete the archery drawing
Let’s add some color to our archery drawing! First, fill in the target face, starting from the outer circle and moving towards the innermost circle, using white, black, blue, red, and yellow. Next, color the arrows in yellow and shade it with a red pencil. Then, color the wooden support, legs, and sides of the target stele with a brown pen.


