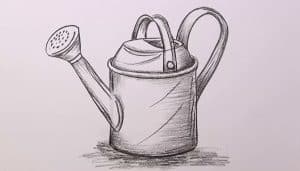
How to Draw A Watering Can easy with this how-to video and step-by-step drawing instructions. Simple drawing for kids and everyone.
Please see the drawing tutorial in the video below
You can refer to the simple step-by-step drawing guide below
Step 1
We’ll start things off simple in this first step of our how to draw watering can. This tool will usually have a large round handle, as this makes it easier to water from any angle.
That’s also what we’re going to draw first in this step of the how to draw watering can.
To do this, we just need to draw two rather large curves running parallel to each other.
There will be a gap at the ends of this handle and this will be the place to connect the body of the watering can later. When it looks like in our reference image, it goes to step 2!
Step 2 – Now draw the body of the watering can
You have completed the handle of this watering can, and now we will start with the body.
The body of this watering can has a slightly rectangular, wavy design that we show in our reference image.
Use some straight lines for the sides of the can and connect the bottom edge of the handle to the reverse side.
Then draw some circles for the top and opening of the watering can, and then draw the base.
The right edge will have a gap and this is where we will attach the faucet a bit later in the tutorial. Now, let’s move on to step 3!
Step 3 – Add some more details and start the faucet
We’ll start opening the faucet soon, but we’ll prepare for this important spectrum by adding a few more details in this step of the how to draw a watering can tutorial.
First, we’ll add some simple lines that will help add some definition to the body of the can.
Add a vertical line near the left edge of the can, then add a slightly curved horizontal line near the top.
Next, to finish this step, we’ll add a small piece of plastic that will help secure the faucet’s handle. You can draw this part using some simple lines on the right hand side where the faucet arm will start.
Step 4 – Next, draw the long arm of the hose
In the fourth part of your watering can, we’ll start drawing the arm of the hose.
These arms will be slightly curved at times, but the arm we’ll be drawing for this design will be pretty straight and stiff.
You can extend some straight, smooth lines up at an angle from the space left on the side of the watering can.
Finally, finish this step by adding some lines at the end to draw a rim where the opening will be added along with any final details in the next step.
Step 5 – Add the final details to your watering can drawing
You are now ready to finalize the final elements of your drawing ready for the final step of this watering can tutorial.
To open the faucet, draw a circle with a path around the outside circumference. You can then connect this wire to another line to the end of the faucet arm.
After this outline is drawn, you can add a series of dots inside it for the holes through which the water will flow.
Then add some simple lines all the way through the watering can to give the drawing more depth, and then finish with any final details of your own that you’d like to add!
Step 6 – Finish your watering can with color
The final step of this watering can, you’ll finish it off with some color!
Watering cans are generally made of plastic, and that means they can come in pretty much every color you can imagine.
In our example image, we’ve kept things subtle by using some really light blues and grays for a cooler look to the watering can.
You can choose some similar colors, but you can also make them light and bold if you like! What kind of colors and artistic mediums are you thinking of using to complete this amazing picture?
Your waterable drawing is done!
This is the end of the tutorial on how to draw a watering can! You did a great job with these 6 steps, and you have an amazing drawing to show it off.
Simple objects like these don’t necessarily translate to a simple drawing, so we hope that these steps make working easy and fun!
Now you can show off what you think will make it picture perfect. You can do this by adding some detail, painting the background, or by getting creative with your color choices and art media.
Then you can visit our website for access to more great drawing tutorials to enjoy! We have a large selection with more being added all the time, so keep subscribing to never miss out.
