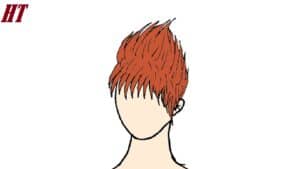
How To Draw Spiky Hair with this how-to video and step-by-step drawing instructions. Easy drawing tutorial for beginners and everyone.

Please see Spiky Hair drawing tutorial in the video below
You can refer to Spiky Hair simple step-by-step drawing guide below
Step 1
I don’t think I have to tell you that you have to start with the basic shape of the head. I mean, how else do you draw hair properly? =D
Step 2
Start by drawing a curved triangle at the right ear to make part of the hair. Then use a few quick strokes to draw the tip of the bangs on the upper left. You can make these as long or short as you like. For drawing purposes, I’m using the normal length.
Step 3
Just like you did the bangs on the right, use the same triangular strokes to complete the bangs. Make sure to completely connect the hair on the right ear and the top of the bangs. While doing this, make sure that the bangs curve down a bit so that they connect and look snug.
Step 4
Okay, now the top of the head. Using the blue circle as a guide for the sink of the head, make the same strokes you used before, except pointing them up. Don’t make the hair clip straight, otherwise it will look fake and spiky. What you want are spikes so you have to make them curved and arched a bit. Start on the left with bangs and end on the right ear.
Step 5
Remove the instructions from the basic header and you’re almost done. Create two zig-zag lines on the top of your head and a pair on the bangs to create shadow as you color. To show off the texture of your hair, you should create a few straight or curved lines throughout your hair. Then comes the coloring part.
Step 6
I used brown in this case so you can see the lines in the hair and how it will look when you’re done. As I always say: don’t forget to color the light lines in a tone lighter than the color of the hair. Once you’re happy with your hair color, you’re finally done! I hope you enjoyed this tutorial!


