How to draw Dreadlocks Hair with this how to video and step by step drawing instructions. Easy Hair drawing tutorial for beginners and all.
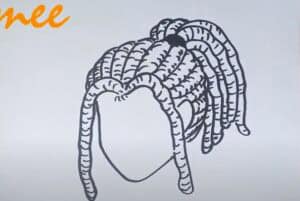
Please see Dreadlocks drawing tutorial in the video below
You can refer to Dreadlocks simple step-by-step drawing guide below
Step 1
Start by drawing a circle. This creates the foundation of your character’s face and will help you outline the shape of the hair.
Step 2
Extend a long, slightly curved line down from one side of the circle. From the end of this line, draw another line that curves up toward the circle. This forms the character’s chin and jaw.
Step 3
Draw a curved line along the bottom of the circle. This will serve as a guide when drawing the hair. Then, connect this line to the jaw, using a curved line to outline the ear.
Step 4
Erase the guide line left by the original circle. You now have a clear outline of the face to work with.
Step 5
From behind the ear, extend several loose, parallel “S” shaped lines. Connect the lines at the bottom using short curved lines. These are your first dreadlocks. Outline the neck using a curved line.
Step 6
Using a short, curved line, enclose a semicircle near the top of the head. This forms a hair tie. From the hair tie, draw more parallel curved lines, connecting the lines at the ends with short curved lines.
Step 7
Draw some fear falling on the forehead. To do this, draw pairs of curved lines of different lengths extending from the top of the hairline. Connect each set of lines using a short curved line.
Step 8
Delete any remaining guide lines.
Step 9
Add texture to hair. Draw long, wavy lines across the scalp and circle each strand of hair using a series of short, curved lines.
Step 10
Color your character, but why stop there? Check out our other easy drawing tutorials to learn how to draw eyes, nose, mouth, and more.
