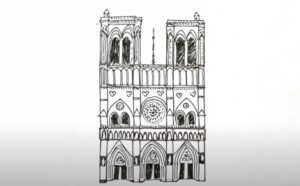
How to Draw Notre Dame with this how-to video and step by step drawing instructions. Follow along with these basic 9 drawing steps. You’ll learn the basics for drawing this gigantic Cathedral of Paris, France.

Please see Notre Dame drawing tutorial in the video below
You can refer to Notre Dame simple step by step drawing guide below
Step 1. Sketch the structure of the church
First, draw the large rectangle of the main church building. Next, add two smaller rectangular structures on top. Then, attach small thin minarets at the top of the cathedral.
Step 2. Shape beams and columns
Now, form three horizontal bars as shown. Then, draw four thin vertical columns.
Step 3. Draw the arch
Start by drawing pointed arches at the bottom level. For the second level, create downward curves. Then, on the third level, draw a series of arches similar to the illustration.
Step 4. Sketch the statues
First, draw a horizontal line above the arches at the bottom level. Then, create a simple outline for the statues by drawing a series of curved shapes as shown.
Step 5. Add doors and windows
Draw the doors and arched windows of the church.
Step 6. Draw the rose window
Create a circular outline of the rose window on the second floor.
Step 7. Add pattern to the rose window in the middle
Draw straight lines across the central rose window.
Step 8. Attach the roof
Form a tall triangle at the top of the cathedral. After that, draw the outline of a cross.
Step 9. Complete the drawing of Notre Dame Cathedral
Grab your colored pencils and add some color to our Notre Dame drawing! First, fill in the high bangs in the middle with a blue pencil. Next, color the windows and doors with a dark blue pencil. Now, color the statues, domes and vertical columns with a brown pencil. Then, use an orange crayon for the cross beams and roofs of the side towers. Finally, Use a white crayon to color in the rose window frame as well as the rest of the Notre Dame wall.


