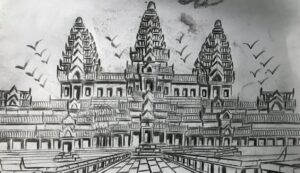
How to Draw Angkor Wat with this how-to video and step by step drawing instructions. Sharpen a pencil and follow along with these simple 6 drawing steps. You will learn the basics for drawing this famous Cambodian temple.

Please see Angkor Wat drawing tutorial in the video below
You can refer to Angkor Wat simple step by step drawing guide below
Step 1. Draw the main structure
First, draw a stack of rectangles to form the walls and roof of Angkor Wat similar to the illustration.
Step 2. Attach the archway and pillars
Now, draw a curved shape with two vertical pillars to form the archways at the base and the side buildings. Next, add a bump shape on top of the central archway. Make sure to delete the wall and roof sections that overlap the dome. Then, draw vertical lines to form the pillars.
Step 3. Draw doors and windows
Add rectangular outlines of doors and windows.
Step 4. Sketch the stairs
Add long horizontal strips to form stairs.
Step 5. Add towers
Create the shape of the three towers on top of the monument as shown.
Step 6. Complete the Angkor Wat drawing
Let’s add some color to our drawing of Angkor Wat! First, color the doors and windows with a dark blue pencil. Next, color the stairs as well as the porch, walls, and roof of the upper floor in a light blue tone. Now, color the walls and roof of the first and second floors with yellow and orange colored pencils. Use a white pencil to color in the pillars and structure above the central roof. Then, color the three towers with a brown pencil.


No Responses