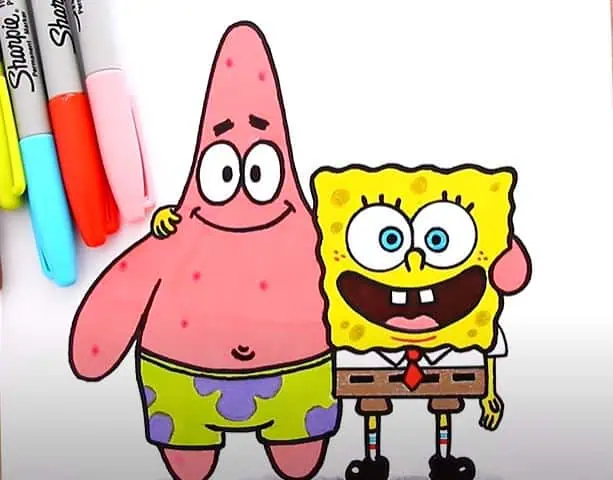
How to Draw SpongeBob and Patrick easy with this how-to video and step-by-step drawing instructions. Cartoon drawing tutorials for beginners and kids.
Please see the drawing tutorial in the video below
You can refer to the simple step-by-step drawing guide below
Step 1
First, you’ll draw shapes and wireframes starting with Patrick’s round belly shape and SpongeBob’s square body shape. Next, draw the guide lines for the top of Patrick’s head, then draw the lines for his arms, and then draw the Spongebob’s legs.
Step 2
All you have to do here is draw Spongebob’s eyes using the face guides that you drew in step one. After the round eyeliner, add a few lashes and a small nose.
Step 3
Now draw his pupils, and then draw his wonderful smile that includes both front teeth and tongue.
Step 4
Sketch the squiggly lining for his squarish body, then draw the holes, and line his pants. Don’t forget the freckles, and then the chin detail.
Step 5
Draw his shirt collar, and then draw his pretty little tie. Once done, you can draw dashes on his pants that are supposed to be his belt. Draw the wrists for his shorts, then draw his arms, hands, legs, socks, and shoes.
Step 6
Now it’s time to start drawing Patrick’s body, the body is very starry and conical.
Step 7
All you have to do here is draw his eyes, eyebrows, belly button and then draw out his shorts. Add in his legs and sea flowers decorating his pants. To finish him, add pupils and smile. Erase the lines and shapes that you drew in step one.
Step 8
In this step, you will perfect your pupils and smile at Patrick. Once you’ve done all of this, move on to line art.
Step 9
Now that you’re done, your sketch of Spongebob and Patrick is now complete. Have fun coloring them in.


