How to Draw Naruto Full Body with this how-to video and step-by-step drawing instructions. Naruto character drawing for beginners and all.
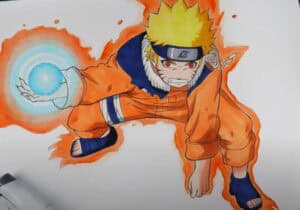
Please see Naruto Full Body drawing tutorial in the video below
Naruto Full Body Drawing Step by Step
Step 1
Begin this first step by drawing out the guidelines and shape of your Naruto character. The first thing to do is draw a circle for the head and then add guidelines on the face. You will then add the shape of his boxy torso and then add the oblong shape of his right forearm and shoulder. Then you’ll add the shape of his legs and feet.
Step 2
Now, in this step, you’ll start adding the spiky shape of his hair and the lines to his bandana. Now you will add the eye line and then the jaw line. Now you will sketch the jacket lining to shape his clothes. Once you’re done, you’ll start lining his pants. As you can see so far it’s simple as pie.
Step 3
Well, you’ve made it to step three and I know you’re thinking this is simple, right? What you’ll do now to complete this step is start drawing Naruto’s eyes and his bandana a little more. Give him an outline for his mouth as well as his eyes. Next add definition to his clothes and then start sketching the shape of his hands. You will then draw more detail on the shape of the pants and start drawing the sock like sandals.
Step 4
Well, now you are one step closer to completing this lesson on how to draw Naruto. What you’ll do in this next step is detail his bandana by drawing the symbol on the front. Next add lining for the ears and then add some facial contours. Add detail to the mouth and then outline the orange jacket collar. Detail the sleeves with lines and wrinkles as well as his pants. Draw the outline of the leg strap on his left thigh and then draw lines to shape his socks like sandals. Add some toes and then continue.
Step 5
Oh, we’ve finally reached the final drawing step and what you’ll do now is simply sketch out some details and lines on his collar, as well as his jacket and pants. You have to pull the cuffs on his crotch and then nail him at the toes. Start erasing all the guides and shapes you drew in step one.
Step 6
This is what your sketch will look like when you’re finished. All you have to do now is color him and then you can call him complete. I hope you enjoyed this step by step tutorial on drawing Naruto Uzumaki from Naruto. If you notice something different between his face on the canvas compared to the finished color drawing. Can you find the difference?
No Responses