How to draw Lavender flowers easy with this how-to video and step-by-step drawing instructions. Flower drawing tutorial for beginners and kids.
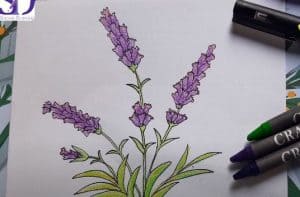
Please see the drawing tutorial in the video below
You can refer to the simple step-by-step drawing guide below
Step 1
A lavender flower may seem simple at first glance, but it is actually made up of some rather complicated details. We will start with small details in this step of the how to draw lavender tutorial.
Taking it slow and step by step is the best way to create this beautiful flower, and for this first part we will start with the top of the flower.
The flower is made up of many smaller buds attached to a central stem, and we will draw it now.
You can start by drawing some small circles that will form these buds. There will be a small cluster of them at the tip before we can see the flower stalk. Then there will be a larger cluster of buds below this.
Step 2 – Add the next bunch of buds
We will continue to add to your lavender drawing in this next step. In this step, we will add another cluster of buds that you drew in the previous step.
As you can see in our reference image, this block will be much larger than the first one. Simply draw a large bunch of buds and then draw the trunk further down from it.
Then we’ll be ready for step 3, so let’s move on!
Step 3 – Next, draw more buds for the lavender flower
You really got to know this lavender drawing tutorial! For this third step, we will continue what we drew in the previous few steps.
That means you will draw another rather large bunch of buds on the trunk below the last bunch you drew in the last step.
Step 4 – Draw more buds in this step
As you can imagine, we will draw another cluster of buds in your lavender step.
You will see in the reference image that this cluster will look a little different from the previous ones you drew. It will be one of the larger bunches on the flower, but this size will be created by making the buds slightly larger than they are rather than drawing many smaller buds.
You can then finish this step by drawing the trunk that extends down from the cluster you drew. There will also be a small leaf protruding from this stem, as shown in the reference image.
That should get you ready to add some final details in the next step, so go ahead!
Step 5 – Now you can add some final details to your lavender drawing
We’ll soon move on to the final step where you color your painting, but first, we have a few final details to add to this step of the lavender tutorial.
First, we will draw another cluster of buds. This one will be a little smaller than the last one, and the buds will be smaller but more numerous.
Then we will draw the rest of the trunk, which will be quite long and slightly curved. We’ll also draw some long, thin leaves off the stem, as shown in the reference image.
That will wrap up the details in this tutorial, but before you continue, you can also add some details of your own.
You can paint a background, and maybe even fill it with some other flowers you might like to complete it. This is just one of the many ideas you can make, so what else can you think of to complete this image?
Step 6 – Finish your lavender painting with some colors
This is the sixth and final step in your lavender painting process, and it’s the step that will help you get interesting colors in your great painting!
Lavender has a pretty distinctive purple color, and that’s what we’ve been looking for in this example image. You can use this information as a reference if you want to keep the colors true to the colors of lavender in real life.
You can also use some of your own color choices for a more stylish look if you like! You can then choose which art medium you will use to bring the colors to life.
Watercolors can work very well for subdued colors like these, but brighter intermediates like acrylic and crayons can work equally well.
We can’t wait to see what color and art medium you choose for this image!
