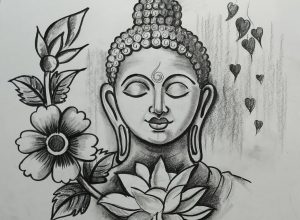
How to draw Gautam Buddha easy with this how-to video and step-by-step drawing instructions. Easy drawing tutorial for beginners and everyone.
Please see the drawing tutorial in the video below
You can refer to the simple step-by-step drawing guide below
Step 1
So friends, you will now be able to see that the creation of this drawing has begun. To draw this step, Lord Buddha will draw a vertical line and following that line will create the shape of Buddha’s face. It is very easy. This drawing will be very nice if you try and follow our steps.
Step 2
Now we have to draw the Buddha’s face parts. The facial parts have already started drawing, so all we have to do is draw the facial parts and draw the Buddha Bun hairstyle. Then we have to draw the shape of the Buddha’s eyes, nose and lips. Hope you guys have understood everything up to this point.
Step 3
Now we have to draw the ears of the Buddha. Very easily, you can draw their ears. Hopefully you will be able to draw all the sketches of Gautam Buddha in one go.
Step 4
So friends, now we have to draw their hair completely as you can see in the image of this drawing. After drawing this will look very beautiful. Hope you all enjoy this Gautam Buddha sketch.
Step 5
So guys, now you will be able to see in this step image that we now have to sketch on the Buddha’s face, then draw the lotus below. Sketching is easy if you don’t know how to sketch, you can search by looking in our blog.
Step 6
So friends, the Gautam Buddha sketch has been completely completed. Finally, we have to draw some leftover flowers that you will be able to see. Then sketch to make this drawing complete. Video tutorial of this drawing is given below. Hope that you all enjoy this drawing. Be sure to watch the Gautam Buddha sketch tutorial video.
