How to Draw Caricatures for Beginners with this how-to video and step-by-step drawing instructions. Cool Drawing for everyone.
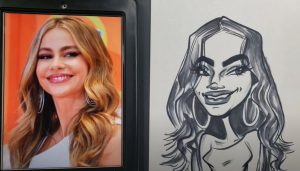
Please see the drawing tutorial in the video below
You can refer to the simple step-by-step drawing guide below
Step 1
Starting at the very center of your paper, draw an irregular vertical oval with a wider bottom.
To ensure that the caricature will be drawn in the center, you can create reference lines by drawing an intersecting horizontal and vertical line.
The point where the two lines meet should be right in the middle of your caricature’s face. Use the lines as a guide.
Step 2 – Outline the first part of the caricature
Draw an ear on each side of the head of your caricature. As seen in the illustration, the upper part of the ears we have drawn is relatively larger than the lower part.
Make sure that the ears on both sides of the caricature’s face are drawn evenly and to the same extent. This will help your drawing look balanced.
Step 3 – Then draw the neck of the caricature
Draw two diagonal lines facing each other below the top of the caricature. This creates the head of your caricature.
The distance between the diagonals depends on how thick or thin the neck you want. As a general rule, inch spacing should be sufficient.
Step 4 – Draw the shirt collar of the caricature
In this step we will create the shirt collar your caricature is wearing. Start by drawing an irregular V-shaped line at the bottom of the neck, with both ends going through the neck.
Then draw two V-shaped lines to the sides on each side of the line we drew earlier. At this point, the entire collar will be finished.
Remember that the lines should only be slightly curved instead of straight to make the collar appear as soft as the real fabric.
Step 5 – Next, Draw Caricature’s Hair
Continue by drawing the hairline of your caricature as well as the ends of its hair. Don’t forget to add buns to add shine to the look of your hair!
As you can see in the illustration, we kept the hair section of our caricature pretty basic. We simply drew a contour for the hairline and added some sticky hair here and there.
You can draw the hair in your caricature similar to how we did it or create a different style! Up to you!
Step 6 – Then draw a pair of thick eyebrows
Draw the eyebrows just below the forehead. Make sure to shade the entire shape of the eyebrows!
Remember, men tend to have thicker brows than women, so keep that in mind when drawing brows.
And since we’re creating a male character, we drew a thick, curved, and defined eyebrow.
Step 7 – Next, draw the nose of your caricature
To create the nose, draw an upward curved line with a bump in the middle to form the nostril or tip of the nose.
Then, draw two diagonal lines above the nostrils, completing the look of the nose.
Step 8 – Then Draw Caricature’s Lips
Draw two connecting curves that form the upper lip. Then connect both ends of each line with another curved line below it, creating the lower lip.
Now, you will want to add a line in the contour of the lips to create a division between the upper and lower lips.
In this step we will also add details inside both ears. Draw a curved line at the top of the ear, following the contour of the ear.
Then draw two more short curved lines to create the inner part of the ear.
Step 9 – Now draw the eyes of your caricature
Complete the look of your caricature by adding eyes. Draw curved lines down below each eyebrow, forming the lid of the eye.
Then, below each curve, draw a circle to outline the iris. Then draw a small circle in each iris over both eyes.
Now, shade the entire iris while leaving the small circle uncluttered for a dramatic “sparkling eye” effect.
Remember that a caricature is often exaggerated, so feel free to emphasize any facial features you want to accentuate.
Now that we have successfully drawn a caricature, it’s time for the most fun part, which is choosing and coloring your drawing!
As you can see in the illustration, we used a custom skin color for our caricature’s skin tone.
To create skin tone, simply mix white, brown, red, and yellow colors. You can add any color depending on the complexion you are trying to achieve.
Please note that this color is best achieved using watercolors or any coloring materials that are fairly easy to blend.
Have fun with colors and watch your caricature finally come to life!
