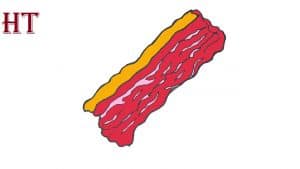
How To Draw Bacon easy with this how-to video and step-by-step drawing instructions. Easy drawing tutorial for beginners and kids.
Please see the drawing tutorial in the video below
You can refer to the simple step-by-step drawing guide below
Step 1
We’ll start with the outline of this delicious dish in the first step of this bacon drawing tutorial!
Once cooked, bacon will often shrink and deform a bit, and this leaves the meat without a smooth border.
That’s why for this contour we will use a rather bumpy, irregular line for the contour.
Using the reference image to guide you how the outline should look, you can draw a slightly diagonal rectangle while using this bumpy line style.
After you’ve drawn the outline of the bacon, we can start adding some details to it as we continue to drill down into the tutorial.
Step 2 – Now, draw some interior details for the bacon
You’ve finished sketching your bacon drawing, so from this point on we’ll draw some interior details for it.
To start this process off, we’ll keep things pretty simple. In this guide, we’re describing bacon with stripes, and that means it’s going to look like this piece is split into several pieces.
We will be drawing the first of these sections in this step and to draw this we will use a straight but bumpy line similar to the ones you used for the bacon outline.
This line will go near the side of the bacon outline and the reference image will show you where to place it.
Then you’ll be ready to move on to the third step of the tutorial!
Step 3 – Next, draw another line for the next segment of the bacon
Now you’re ready to draw the bacon sequel in this third step of our bacon drawing tutorial. This will be closer to the left edge of the bacon.
It will also be a little different from the other lines you’ve drawn so far.
The previous lines are bumpy and look a bit irregular, while the line that we will draw in this third step will be slightly wavy but otherwise it will be quite straight and smooth.
Then we’ll just have some more sections and details to add in the next few steps!
Step 4 – Now, draw the last part of the bacon
There’s only one final piece left to add to your bacon drawing in this next step.
This next line will follow the same trend as the first few lines you drew, where it will be another bumpy line like the outline and the first part.
This last part will go even closer to the left side of the bacon, and when it’s drawn, you’ll have the full outline for your bacon.
Before you colorize your fascinating artwork, we just need to add some final details to make it look even better now!
Step 5 – Add Final Details to Your Bacon Drawing
Bacon will often have streaks of fat running through it giving it an almost marble texture, and we’ll be painting this streaked fat in this fifth step of the bacon drawing tutorial.
To draw these fat parts, we will make some thin shapes the length of the bacon.
These long shapes will be thin and drawn with the same bumpy lines as what you used for the rest of the bacon outline.
This is a step where you can also change things up by adding more fat or by making them a bit thicker, depending on your preference.
Before continuing, you can also draw some more details! One idea is to paint this bacon on a plate with many of your favorite breakfast items.
What would you like to enjoy with this delicious bacon?
Step 6 – Complete your bacon drawing with color
You’ve reached the final step of the bacon drawing, and in this step we’re going to finish it off with some color.
This is another step where you will have some freedom with how you choose the color for it.
In our reference image, we used several shades of pink and light brown to give it a less finished look.
You can use darker shades of these colors to make it look better or use some lighter shades to make it look less cooked.
What types of colors and art media will you use?
Your bacon drawing is done!
That should end this tutorial on how to draw bacon! Although you may have eaten bacon many times in your life, it can still prove difficult when you sit down to learn how to draw it.
The goal of this tutorial is to make sure that you can draw it not only with ease, but with fun at the same time!
As you complete this drawing, remember that you can also add your own details and ideas.
We’ve gone over a few ideas you can apply, but you should make sure to add any interesting details, colors, and media choices you can think of.
