How to Draw a Treasure Chest easy with this how-to video and step-by-step drawing instructions. Easy drawing tutorial for Beginners and kids.
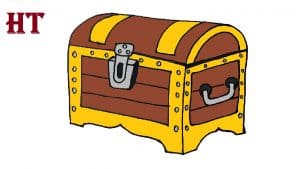
Please see the drawing tutorial in the video below
You can refer to the simple step-by-step drawing guide below
Step 1
Start by drawing a rectangular block. Use the lines to draw three rectangles, connected together.
Step 2
Erase part of the bottom parts of the cube. In each opening, draw two curves that meet at one point, filling the gap. This forms a decorative base of its chest as well as its feet.
Step 3
Adorn the chest by drawing rectangles inside the front and sides.
Step 4
Give the rectangles inscribed the shape of the wooden planks by drawing parallel lines, across them. Then, draw a handle on the side panel. Start by drawing two incomplete circles. Draw two curves to connect the circles, forming a handle.
Step 5
Draw a padlock on the front of the treasure chest, erase as needed. First, draw a quadrilateral. The top and sides of the shape should be made of straight lines, while the bottom part of the shape should be a curve. Give straight edges a three-dimensional shape by drawing a line parallel to the edge of the figure, connecting to the corners with short lines.
Step 6
Erase the top of the cube to make room for the curved upper part of the chest. Draw half a circle on one end of the chest and a quarter of a circle on the other end. Connect the two with a straight line.
Step 7
Adorn the lid of the chest. Draw the second half of the circle in the original half circle. Then, paste the two rectangles onto the top of the lid.
Step 8
Unplug the lock, delete as needed. First, wrap a four-sided shape with a curved top and bottom on the lid of the chest. Surround a shape using a “U” shaped line below it. Draw three small circles in the image above and a rectangle in the image below.
Step 9
Draw small circles near the edges of the chest. They represent the nails or bolts that hold the ribcage together.
Step 10
Finally let’s color the chest
