How to Draw a Shuttlecock with this how-to video and step-by-step drawing instructions. There are 6 easy steps to follow, children will enjoy designing their own badminton shuttlecock on paper. Also included is a downloadable version of this shuttlecock drawing lesson.
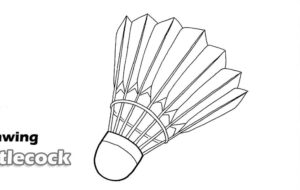
Please see Shuttlecock drawing tutorial in the video below
You can refer to Shuttlecock simple step-by-step drawing guide below
Step 1. Shape the cork head
Draw the domed cork of the shuttlecock.
Step 2. Sketch the coil
Now add two bent strips to outline the coil.
Step 3. Draw curls
Next, pull out the long, thin strands of hair and wrap them around the coil.
Step 4. Attach feathers
Sketch the shape of the feathers attached to the hair stick. Afterward. Add texture to the fur by drawing short lines.
Step 5. Draw more curls
Draw more visible curls in the back by creating straight lines as shown.
Step 6. Complete the shuttlecock drawing
Let’s add some color to our sphere drawing! First, shade the curls with a brown pen. Next, color the coil with a white pen. Now, use vibrant shades of blue, yellow, and pink to color the feathers. Then, use white and dark brown pencils to fill in the top of the cork.


No Responses