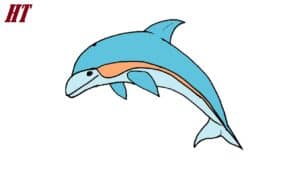
How to Draw an easy Dolphin with this how-to video and step-by-step drawing instructions. Fish drawing tutorial for beginners and everyone.
Please see Dolphin drawing tutorial in the video below
Dolphin Drawing Step by Step
Step 1
For the first step of this dolphin drawing tutorial, we’ll start from the smallest! To begin with, you can draw the distinctive snout of the dolphin.
The snout will curve quite clearly before spreading out slightly to form the head of your dolphin’s face. You can use the reference image as a guide for how it looks!
Step 2 – Next, draw the top of the head
A dolphin has a thick and round head, and we’ll be drawing a head for your dolphin drawing in this second step of our how to draw a dolphin tutorial.
To add the head, carefully draw a circle for the top of the head, then draw a slightly less rounded line for the bottom.
I recommend using a pencil to draw each stage on the dolphin’s body, as it can be a bit difficult to get the right shape at first!
Once you’re happy with how the dolphin looks, you can always go over the pencil with a pen.
Step 3 – Next, draw fins and back
Now that the head of the dolphin drawing is complete, you can start adding the body. First of all, you can use a curved line for the dorsal fin on the dolphin’s back.
Then you can use a very curved line for the dolphin’s back.
At the bottom end of the head, simply use a curved line to create flippers for your dolphin. Now it’s starting to really look like a dolphin!
Step 4 – Now we add the head of the tail and the belly
For the next step of this dolphin drawing tutorial, we are going to add some lines to the body.
To start, draw a slightly curved line extending from the flippers and toward the tail.
Then you can bend the line at the end and also at the end of the back line outward to form the starting point of the tail.
Step 5 – Next, cut off the dolphin’s tail
Your dolphin sketch is almost done, just one more stroke and it’s done.
You can use a curved line to join the two ends of the tail line to complete the look of the tail and make it look like the reference image.
If you’ve used a pencil up to this point, you can now review it with a pen if you’re happy with the look of your dolphin’s body.
If you do this, be sure to let the ink dry before erasing the pencil underneath, or the ink may smudge!
Step 6 – Now you can draw the face
Your dolphin drawing is almost done and you should be very proud of what you have accomplished so far! All you need to draw now is a face, which we will add to this section.
You can copy the face we used in the reference drawing, but don’t be afraid to change it up a bit if you want!
You can change the mouth or eyes if you want a new expression for your dolphin.
After you finish painting, if you feel more creative then you can paint a nice background for your picture.
I would draw a beautiful sunset background if I drew this, but what do you think you would do?
Step 7 – Now finish it with some color
With the final details completed, your dolphin drawing is just one step further!
This will be a lot of fun, as you will have some fun creating and letting your imagination run wild as you color in your amazing dolphin drawing.
We’ve shown a way you can colorize our reference image, so you can use those colors or choose your own favorite color to color it!
Along with your color choices, you can also have a lot of fun trying out different art mediums for coloring.
Some examples might be acrylic paints, watercolors, crayons and pencils.
Different mediums can give very different looks in terms of color and texture, so you can really experiment and see what works for you!
We can’t wait to see the creative ways you complete your drawings.
You can see more fish drawing:
