How To Draw Nemo Fish easy with this how-to video and step-by-step drawing instructions. Fish drawing tutorial for beginners and kids.
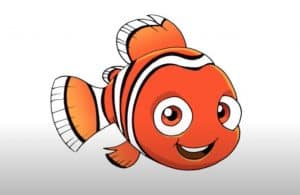
Please see the drawing tutorial in the video below
You can refer to the simple step-by-step drawing guide below
Step 1
To start drawing Nemo, you need to draw a shape similar to the one on the left. Nemo is in a slightly bent position for this drawing, so this shape, (which will be his middle and head), should be flat at the bottom and rounded at the top.
Step 2
You can see that the back part of the shape will become the tail and most of the front will be Nemo’s head.
Step 3
Expand the shape from the last step, give Nemo some fins. He needs two fins both above and below his body. Make the top fin near its head the largest fin.
Step 4
Draw Nemo’s tail attached to the flat back part of his body. Its tail is quite large and is almost half the size of its body.
Also, give Nemo his signature “small fin” on the side of his body.
Step 5
Nemo has huge eyes for such a small fish. Draw his eyes near the front of his head. Unlike a real fish which has eyes on the sides of its head, Nemo’s eyes must be directed forward, like a human’s.
Step 6
Draw Nemo’s bright smile right under his eyes. You can also see in the image on the left, that I’ve pushed his cheeks out a bit, to add to his smile.
Step 7
Draw Nemo’s stripes and darken the edges of his fins, and you’re done!
Hope you enjoyed one of my other tutorials here at Draw Central.
Don’t forget to comment and like us on Facebook!
Thanks everyone!
