How to Draw a Roach Fish easy with this how-to video and step-by-step drawing instructions. Fish Drawing tutorial for beginners and kids.
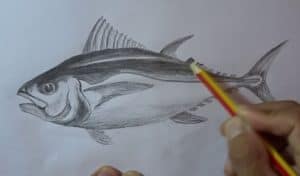
Please see the drawing tutorial in the video below
You can refer to the simple step-by-step drawing guide below
Step 1
To draw your roach you will need to start with the head. To draw the head, draw a cone. For the eyes, draw a small circle with a larger circle around it.
Step 2
Next, you’ll need to draw Roach’s body. To create the body, draw a curved line from the top of the head. Then draw a second curved line from the bottom leg of the head leaving some space for the fins. Let them both taper back and join them in a straight line.
Step 3
Now you’ll want to add the upper fin by drawing two lines and connecting them with a curved line.
Step 4
For the next step, you’ll want to draw the lower fins. To draw the lower front fin, draw a small triangle coming out from the bottom of the body. Then draw a section of a triangle behind that triangle for the fins on the other side of the body. Now, make the lower back fin the same as the upper fin using two angled lines and a curved line to join them.
Step 5
To draw the tail, you’ll want to draw two triangles out of the back body with one side of each triangle joining the side of the torso and the other joining.
Step 6
Finally, you’ll want to draw the pattern and flip. For the model, draw a full length line of the body going through the middle. For the flip set, draw a small oval on the front part of the body. You have now finished drawing your roach.


No Responses