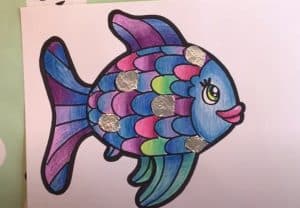
How to Draw a Rainbow Fish easy with this how-to video and step-by-step drawing instructions. How to draw a fish for beginners and kids.

Please see the drawing tutorial in the video below
You can refer to the simple step-by-step drawing guide below
Step 1
To draw the Rainbow Fish, let’s start with the head. Create a large teardrop shape with a rounded point facing to the right. At the round point, add a line to make the mouth.
Step 2
Now, add two circles, one inside of the other, for the eyes. These circles should just be to the left and up from the mouth you drew.
Step 3
Next, draw the body with two curved lines starting at the bottom and top of the head, and going to the left. Each one has to curve outwards to create a thick body, then start making the tail. But don’t join the lines, you need to leave room for the tail!
Step 4
For that tail, draw three lines, two connecting to the body and slanting up and down, and vice versa. Then connect those two lines with a third wavy line. Add paths from the body to the tip of the fin to give it texture.
Step 5
Now for the upper and lower fins. Draw each line as a series of two curved lines that meet with a dividing point about the lower half of the body. One set of curves will be at the top, the other at the bottom.
Step 6
Next, we draw the shape of the fin again, forming three lines. The first two will be the top and bottom of the fin, and the third will be a wavy line connecting the first two. Then add more paths from the body to the tip of the fins to add texture.
Step 7
Finally, we paint the individual, colorful scales that Rainbow Fish have. IT looks like a lot of work, but if you take your time, it will look great! Each scale is just a half-circle, starting towards the head, curving backwards, and then back to the top. Place many of them and color them with different colors!


No Responses