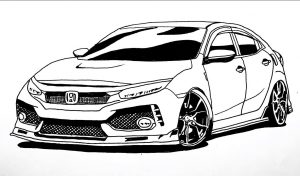
How to Draw a Honda Civic easy with this how-to video and step-by-step drawing instructions. Car Drawing Tutorial for beginners and everyone.

Please see the drawing tutorial in the video below
You can refer to the simple step-by-step drawing guide below
Step 1
Use light lines to outline the body of our cool Honda Civic. Note that the contours of all cars are the same. Also note that the lines are not clear and uniform.
Step 2
Here we continue to use light lines to outline the Honda Civic. At the front we mark the characteristic headlights and grille. On the side, we outline the wheels and mirrors.
Step 3
So, dear friends, let’s move on to the details. Use hard and dark lines to accentuate the angular headlights and grille details. In the middle of the grille draw the Honda symbol.
Step 4
With a long and slightly curved pull the hood. Under the grille, draw the bumper with the lower grille, as in our example.
Step 5
The tops of all cars are very similar, so we draw the roof and window lines of our Honda. Draw the rearview mirror and go to step 6.
Step 6
We continue the line of windows and form the doors of the Honda Civic. Sketch of the door handle. Draw the back and move on to the next step.
Step 7
Quite a difficult step. First, draw the wheel arches in a semicircle. Inside the arches draw oval wheels.
Step 8
Just one more difficult step and our wonderful Honda Civic will be ready. Inside the wheel, we draw the outer contours of the rim in the form of an oval. In the center of the rim, draw a small circle and spokes of the rim as shown in our example.
It’s a drawing lesson on how to draw a Honda Civic step by step. Click the “share” button below this article and share it with your friends or maybe on your website, this will help our website a lot to develop and create new content. New drawing lesson.


