3D Rubik’s cube Drawing easy with this how-to video and step-by-step drawing instructions. 3D drawing tutorial for beginners and everyone.
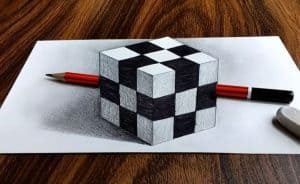
Please see the drawing tutorial in the video below
You can refer to the simple step-by-step drawing guide below
Step 1. First you have to draw the Cube
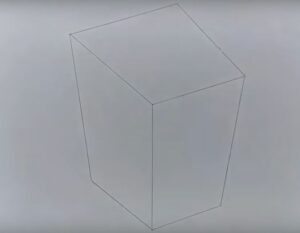
You must first draw this cube. This cube has to be drawn very carefully as I have provided it for you in this image. Its shape should be exactly as shown in this image, its dimensions can be kept at your disposal.
Step: 2 Draw the junction on the Rubik’s cube
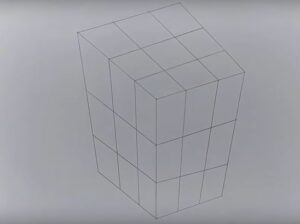
Now you have to draw a junction inside this cube very easily. The harder this looks, the easier it will be for you to work it out your way. The line should be exactly what is inside this image.
Step: 3 Fill the Rubik with black color
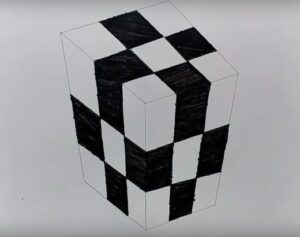
Then you have to fill them with black color. First you have to check the box you want to color. Then you have to color. The color must be painted carefully so that the color cannot come out of the box.
Step: 4 Draw Shadow of Cube
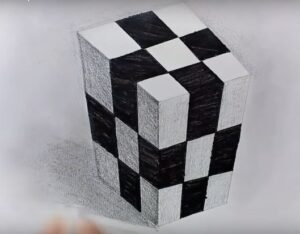
Then you have to draw the shadow of this cube. The shadow will be very easy to draw. You just need to make a shadow. If you don’t understand the left side of the cube, then you should watch the video on how to draw its shadow.
Step: 5 Cut the above paper slightly with Scissors
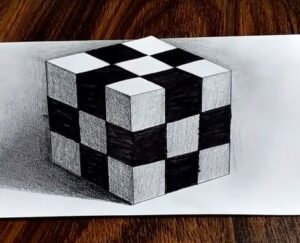
Then you have to cut this paper a little, not only cut the cube from the cube that will appear.
Step: 6 Complete the drawing

After this drawing, you must place the broken pencil on both sides of the cube. I mean the sharp edges of the pencil should be on the left side of the cube and the back part is holding the right side of the block, then our drawing should be ready.



i love your 3d art
Thank you
Nice the drawing came good just send some more 3d drawings to the Email given below
Very nice