Polar Bear Drawing easy with this how-to video and step-by-step drawing instructions. Wild animals drawing for beginners and kids.
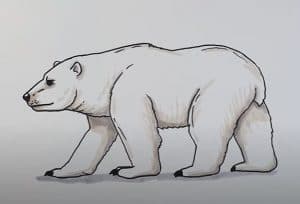
Please see the drawing tutorial in the video below
You can refer to the simple step-by-step drawing guide below
Step 1
Alright, first draw a perfect circle for his head and a not so perfect half circle will be his neck.
Step 2
Then continue by creating lines to form the frame for his body. Just look at the shape of the upper lines and copy.
Step 3
As you can see, it is starting to take shape. The lining you drew in the previous step is the front leg and part of the chest. What you do here is shape the rest of the bear’s paw and start drawing the bear’s back.
Step 4
Make some small details on the fur and contour the toes and hind legs.
Step 5
Now we can start working on our faces. Draw two small oval circles for the eyes, a muzzle for the nose and a small line for the mouth. Also add the fingernails as well as the lower back of his shins.
Step 6
Sketch the ears as shown and add details to the hind paws.
Step 7
At this point, the polar bear has taken shape and now is a good time to start erasing unwanted lines to clean up your drawing.
Step 8
Add a bit of ruffle to his coat and don’t forget to make those nails a bit longer and thicker. Then you are done with your picture should like him. Good job
No Responses