Leopard Drawing easy with this how-to video and step-by-step drawing instructions. Wild animals drawing for beginners and everyone.
Please see the drawing tutorial in the video below
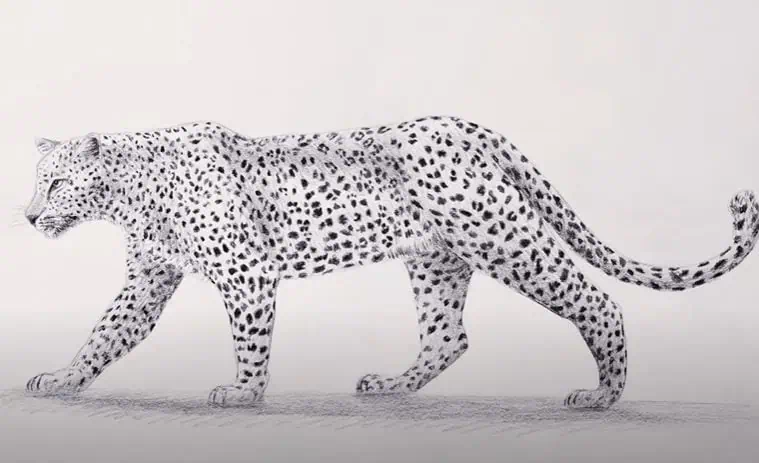
You can refer to the simple step-by-step drawing guide below
Step 1
First, make a perfect circle for the leopard’s face, then draw a rough sketch of its body. This is the beginning of the frame.
Step 2
Next, add an inverted 9 for the back leg and a single line for the front leg. Two shapes that look like balls will be the cat’s mouth. I know it looks weird.
Step 3
Did you look cool? Add the ears, eyes and bottom half of the mouth. We’ll also make those lines look like legs by outlining the bottom of the front legs and the top of the back legs.
Step 4
Outline the front legs at the back and give the cat the bottom of the hind legs. As you can tell, I had some trouble getting his tail right. My hand seems to be able to draw nice lines in photoshop. However, it’s a lot easier to draw by hand, so you won’t have problems like my situation.
Step 5
You can start sketching the paws and perfecting the hind legs as well. Move up to his face and give him his beard and his definition on the top of his head. You do this by adding some simple lines.
Step 6
At this point your is almost done. If you want to go ahead and start cleaning up your sketch by erasing unwanted lines, feel free. Some simple additions are left in like nails and toes.
Step 7
That’s all you need to do is take your time and draw his points. Remember that leopard spots are not uniform, everyone is different. Some are smaller than others and some are a little bigger so are others. The spots on the leopard’s face are very small around the growing antennae and around the eyes. Just some helpful suggestions.


