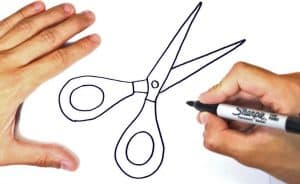
How to Draw Scissors easy with this how-to video and step-by-step drawing instructions. How to draw for beginners and kids.

Please see the drawing tutorial in the video below
You can refer to the simple step-by-step drawing guide below
Step 1
For the first step of the scissors tutorial, we’ll start with the round handle of the scissors.
You can start this with a simple circle that will make a hole in the handle. Then draw a thin border around this hole for the outside line of this handle.
These contours will then extend down in a straight line, as shown in the reference image.
We’ll be building on these aspects in the next few steps, so keep it up!
Step 2 – Draw the continuations of the handles
This part of your scissors drawing will be all about finishing the handles. Before drawing the second handle, you can complete the first handle that you started in the first step.
You can extend the lines you started with in the previous step into the circle to which the screw will be attached to hold the handles together. We’ll be drawing that screw a bit later in this tutorial.
Once you’ve drawn the first control, you can add a second! This handle will look pretty much the same as the first one, so you can recreate the first step with just a few minor differences.
That’s all that needs to be done for this step, so next we’ll start with the blades of the scissors.
Step 3 – Now, start the first blade of scissors
A pair of scissors isn’t very useful without a blade to cut, so we’ll start adding that aspect to this step of the scissors tutorial.
This particular step will be quite simple, but it is also a very important step! To begin the contour of the blade, simply extend a line down from the handle.
This line will be very straight, so you can use a ruler for most of it if you want to make it a little easier.
If you do this, just make sure to add a small curve to the end of this line. We will continue to draw this blade in the next sections of this tutorial.
Step 4 – Next, continue drawing the blades
The fourth part of your scissors drawing will be drawing some more blades. First, extend another straight line from the curve at the end of the first blade inward until it reaches where the blades join.
You can then use a ruler to extend another straight line from the other handle of the scissors.
Once you’ve started that second blade, you just need to add some details and final touches before we end this tutorial.
Step 5 – Now you can complete the final elements and details
As we mentioned in the previous step of this scissors tutorial, this fifth part will be all about adding some final strokes and elements to complete it.
You will need to add another line to the second blade and extend the other side towards the handle, as shown in the reference image.
Then the last bit would be to draw a small circle where the two pins are joined. That will form the connecting screw we mentioned in one of the first steps. Finally, draw a line through the center of this screw.
That should wrap up the final details of this tutorial, but before you move on to the final step, you should add any additional details you might want!
You can draw some patterned paper or material these scissors might be cutting. You can also draw some pattern details or small stickers yourself on the scissors.
What more details can you think of to complete this scissors drawing?
Step 6 – Finish your scissors drawing with some colors
That brings you to the final step of this scissors drawing you worked so hard on! This is the part where you can have fun bringing some great color to your images, and it’s also a step where you can get really creative with it.
For our reference image, we used a nice green for the handle with some gray for the blades.
This is just one of many options that you can choose from, and you are free to use any color you love for this drawing!
If you’ve painted any additional background or detail elements, you can add some great color to those as well. What colors and art mediums will you use to bring this scissors drawing to life?


