How to Draw Eyebrows on Paper easy with this how-to video and step-by-step drawing instructions. Pencil drawing tutorials for beginners and everyone.
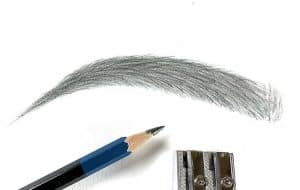
Please see the drawing tutorial in the video below
You can refer to the simple step-by-step drawing guide below
Step 1
Shading your brows With the H pencil, use my shading technique to outline the shape you want your brows to have. If you use this technique, your contours will blend in perfectly when you draw real hairs afterward. Do not sketch it like the image below. It will be very obvious in your final drawing and a complete pain to erase!
Step 2
Drawing the first row of hair We will draw the hairs in different directions. Using a sharp 2B pencil, start by drawing a row at the bottom and go from left to right. These hairs grow in an upward direction and start downward near the end of the eyebrow.
Step 3
Add a second row Now let’s add an additional row or two. Remember to draw the beginning of the eyebrow longer than the end.
Step 4
Add Unique Hairs Make small changes to the direction and number of curves of the hair. Connect several strands of hair together at their ends. I’m not going to add any hairs on the left side of the eyebrow because I don’t know if that will be enough. I will be able to decide after drawing the upper part of the eyebrows. How you design your eyebrows is up to you, so you can add as much hair as you want.
Step 5
Darken overlapping hairs In this step, I did not add any new hairs. I just see which ones overlap and use the sharpest edge of my 4B mechanical pencil to darken those areas. This will make men look more interesting.
Step 6
Draw a light row of hair at the top Time to draw the top hair. I usually draw the first row very thin/light and then increase the thickness/darkness with the following rows. Your ultimate goal is to get a smooth transition from upward to downward hair.
Step 7
Merge strands of hair with bottom rows Add an additional layer or two. When the ends of the hair begin to come into contact with the upward-facing hair, let your strokes slowly blend in the same direction.
Step 8
Filling the Center When painting in the center of your brows, focus on drawing the hairs in the direction that looks most natural to you. If you used the shading technique for your contour in step 1, you’ll notice that it blends well and there’s no need to erase it.
Step 9
Edit If you see any inconsistency in values or you think you would like a darker brow, use a sharp 4B muscle pencil to brush through some hairs and darken the overlapping hairs. or individual hairs that you want to stand out from the rest. Be very careful not to overdo it. It’s hard to erase thin lines. If you need to bleach any hairs or make them lighter, pinch your kneaded eraser until it looks knife-sharp, then press directly onto your hair to loosen a layer of graphite.
Step 10
Adding Shine on Eyebrows Can you spot anything different in the image for this step? I added shadows to the hair forest. If you have light skin like me, use a 2B pencil to fill in your entire brow. Do not press too hard. At this point, the eyebrows still look like glued on the face. We will fix this in the next step.
Step 11
Add light shadows around the brows Okay, last step! We just added some shadows inside the boundary of the eyebrows. Now it’s time to draw the shadow around the outside. If your light source is coming from above (like mine), draw your shadows just below the eyebrows and/or just the sides. Subtle shadows will do. Avoid hard edges! If you think it’s still sticky, use a sharp H pencil to draw very light hairs around the top and sides.
And that’s it! I just wanted to say a huge thank you to all of you who took the time to leave a comment or connect with me via email or Facebook. Your kind messages remind me that what I do makes a difference and keep me motivated to keep going! You are so great! :).
