How To Draw A Mermaid Girl easy with this how-to video and step-by-step drawing instructions. Cute Mermaid drawing for beginners and everyone.
Please see the drawing tutorial in the video below
You can refer to the simple step-by-step drawing guide below
Step 1
The first step will include the shapes. The first one is for her head, and the other two are for her torso and back. Draw as directed for her tail and face.
Step 2
Next, outline the shape of her face and then start drawing her long, thick, aquatic hair. The style I choose to go with is long, wavy, and straight. Instead of bangs, I chose a parting style. When you’re done sketching your chosen hairstyle, remember to add details in the form of strands.
Step 3
Using the facial guide, start drawing her eyes, nose, and upper mouth contour for her lips. The eye contour should be as thick as the lashes. Create a crease or crease for her eyelids and move on to step four.
Step 4
Draw well shaped eyebrows and then draw eyeball liner. Outline the rest of the mouth including the lower and upper lip.
Step 5
Continue sketching the mermaid’s glamorous long hairstyle, and you’ll notice that I’ve drawn the hair just the way I wanted it to. Take your time when tackling this step as one of the charms of mermaids is their hair.
Step 6
Now that the head, face, and body are complete, you can start sketching the upper body. Start with her shoulders, arms, and outline her bust, i.e. her plump looking breasts. You can choose to paint a pretty shell necklace or leave it as is.
Step 7
Draw the arm inside her pose, then her hand, and then the pearl bracelet. Sketch some details on her hands and then draw on her back and chest or torso.
Step 8
Okay, let’s start sketching the shape of her bottom and notice how her body or fins curve. The lines on her body must be massive. Sketch some surface details and move on to step nine.
Step 9
For the final step, sketch her gorgeous tail fin like that, and as you do this, remember to take your time making it look great. Finally, outline the scattered scales on her body and erase the lines and shapes you drew in step one.
Step 10
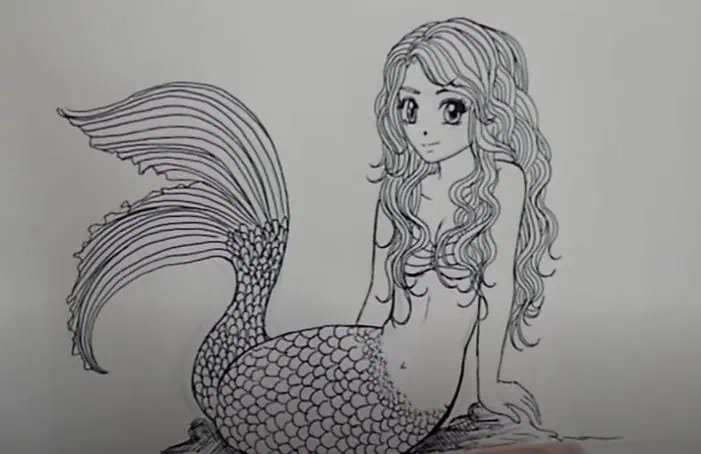
This is the finished line art. Choose a set of colors so you can start the creative part of the whole lesson.


