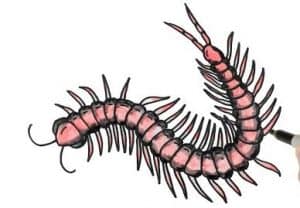
How to Draw A Centipede easy with this how-to video and step-by-step drawing instructions. Easy animals to draw for beginners and everyone.

Please see the drawing tutorial in the video below
You can refer to the simple step-by-step drawing guide below
Step 1
As you can see drawing this arthropod would be a lot easier, you might think. Start with a small circle for the head and then add guides for the long antenna, body, and hind legs.
Step 2
You will now draw out the actual shape of the antenna, and then outline the shape of the bumpy-looking body that is actually different segments when finished.
Step 3
Now you will start drawing the centipede’s feet on the left side, and for this species there are only fifteen legs on one side, which means another fifteen will be drawn on the right side. Once the pins have been sketched, move on to the next drawing step.
Step 4
For the final step, all you have to do is draw small longitudinal lines to represent the separation of segments of the centipede’s body. Next and last, sketch the remaining fourteen pins and then start erasing all the guides and shapes that you drew in step one.
Step 5
Now that you’ve finished drawing a centipede, you can color it to look like any pede you want. I hope you had fun with this tutorial, and remember to join me again for more drawing fun.


