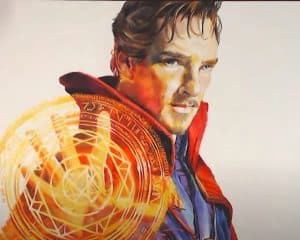
How to draw doctor strange realistic with this how-to video and step-by-step drawing instructions. Pencil drawing tutorial for beginners and everyone.

Please see the drawing tutorial in the video below
You can refer to the simple step-by-step drawing guide below
Part 1
If you are a beginner, you need to make more sketches to ensure accuracy and have a perfect picture. Including the following steps:
Step 1
So we need to outline Dr. Strange’s skeleton. Use the first bright lines to outline the head in an oval shape. Next, using a normal line, draw the spine with the chest and pelvis. Next, our arms draw with simple lines.
Step 2
Let add some Muslims’ flesh to Dr. Strange’s skeleton. But before you do this, highlight the symmetrical lines of the face. Next draw the neck as a cylinder. Join the chest and pelvis, creating the body of our superhero. Outline arm.
Step 3
Now let’s start adding details. Here we will need to draw a face. Use the horizontal line from the previous step to outline the eyes and eyebrows above the eyes. On the nose along the nose, and just below the nose draw the mouth and mustache.
Step 4
Carefully outline Dr. Strange’s face – forehead, cheekbones and chin. Next draw ears and hairstyle comb on the side.
Step 5
Draw a high collar, top of the cape and clothing on the torso. In the center we draw a round brooch and logo on the chest. Add some folds and delete all unnecessary instructions.
Step 6
Continue drawing the upper part of the Dr. Strange. Draw out a large number of folds on the arm. Hand drawing as in our example (learn more in the lesson on how to hand draw).
Step 7
And in the final step of the drawing tutorial on how to draw Doctor Strange, we draw a cape.
Part 2
And now we will color him, this part requires meticulousness to get a realistic picture of life.


