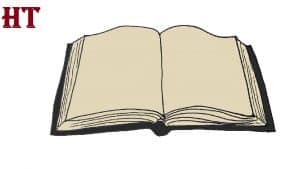
How to draw an open Book Easy with this how-to video and step-by-step drawing instructions. Easy drawing tutorial for beginners and kids.

Please see the drawing tutorial in the video below
You can refer to the simple step-by-step drawing guide below
Step 1
Start as you do an actual book – with the first page. Draw three curves to outline part of the wavy rectangle. Note that the top and bottom lines of the page are nearly parallel, and that the edges of the page are nearly straight.
Step 2
Draw a line from the bottom of the page to the top of the page, outlining the spine or the spine. Then let the line continue to form the next header. Use two more curves to completely wrap the page.
Step 3
Draw more pages below them. Use curves to outline rectangles partially obscured by the first pages. Note the line where two of the pages come together at the back of the page.
Step 4
Draw a rounded triangle at the base of the spine. In the opposite corners, draw a series of overlapping curves to indicate the page corners. Then, connect the corners and spine with a series of almost straight lines.
Step 5
Extend short lines from the spine and connect them with a curve. Then, draw lines that are almost parallel to the final line, connecting the corners to the spine. This outlines the cover of the book.
Step 6
Detail of page edges. Draw curves from spine to corner. Use two curves, connected to a “V” shaped line, to form a marking strip. Delete as needed.
Step 7
Draw curves of different lengths from spine to corner to give vignettes to the edges of the page.
Step 8
Draw a series of curves through corners. Then, draw lines of different lengths across the remaining page edges.
Step 9
Draw curves of different lengths on the pages to denote the presence of writing.
Step 10
Coloring your cartoon book.


