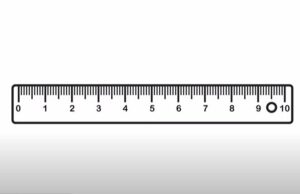
How to Draw a Ruler with this how-to video and step by step drawing instructions. Easy drawing tutorial for beginners and everyone.

Please see Ruler drawing tutorial in the video below
You can refer to Ruler simple step by step drawing guide below
Step 1. Sketch the body of the ruler
Start by drawing a long rectangle to create the body of the ruler.
Step 2. Start adding measurement marks
Now, draw evenly spaced short lines to represent the measurement marks.
Step 3. Draw shorter lines in between the measurement marks
Between each pair of longer lines, draw shorter lines to create additional marks.
Step 4. Write the number
Write the numbers 0 to 12 next to the measurement lines to represent the measurement.
Step 5. Draw the ruler hole
Add a round hole near one end of the ruler.
Step 6. Complete the ruler drawing
Let’s make our ruler even more striking and interesting! Use a yellow pencil to color the ruler and add light orange for shading. Step 1. Sketch the body of the ruler
Start by drawing a long rectangle to create the body of the ruler.
Step 2. Start adding measurement marks
Now, draw evenly spaced short lines to represent the measurement marks.
Step 3. Draw shorter lines in between the measurement marks
Between each pair of longer lines, draw shorter lines to create additional marks.
Step 4. Write the number
Write the numbers 0 to 12 next to the measurement lines to represent the measurement.
Step 5. Draw the ruler hole
Add a round hole near one end of the ruler.
Step 6. Complete the ruler drawing
Let’s make our ruler even more striking and interesting! Use a yellow pencil to color the ruler and add light orange for shading.


No Responses