How to Draw A Foot easy with this how-to video and step-by-step drawing instructions. Simple drawing for kids and everyone.
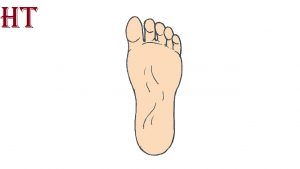
Please see the drawing tutorial in the video below
You can refer to the simple step-by-step drawing guide below
Step 1
To start this tutorial on how to draw feet, we will start with the heel of the foot. This will be plotted using a simple curve like the one you can see in our reference image.
It should curve slightly to the left, as this is the left foot viewed from the bottom. After you have drawn the heel, we can add more parts to it in the next step.
Step 2 – Continue adding legs in this step
This leg drawing of yours will be simple but very important! We’ll be drawing the midfoot for this part, and it’s helpful to refer to the reference image carefully as you draw.
As you draw these lines up, they will curve slightly outward, which we will add in the next few steps.
That’s all it takes for this step!
Step 3 – Now draw the upper part of the foot
We’ll work on adding the upper part of the foot in this third step of the how to draw the feet tutorial.
To do this, you can continue from the lines you drew in the previous step and let them curve inward again.
The line on the left hand side of the foot will be slightly longer and straighter than the line on the right, so be sure to follow the reference figure as you draw.
Step 4 – Start adding some toes to your foot drawing
A foot is never complete without some toes, so we’ll start adding some to your foot drawing in this next step.
Starting from the big toe, it will have the base of two small straight lines. Then for the round part you can draw an oval-like shape with a small gap at the bottom of it.
You can then draw a small curved line from the right-hand line of the big toe that will extend under the next toe.
This next shape will be much thinner and will have two straight lines with a thin oval on top.
Finally, the next toe will also have a rounded top, but it will lean slightly to the left, as can be seen in our reference image.
Once you’ve drawn these toes, we’ll add the rest in the next step.
Step 5 – Now you can add the rest of the toes and the final details
For this part of the foot tutorial, we will focus on the remaining toes and the final details before moving on to the final step.
The next two toes will look a lot like the more curved toe they’ll follow, however each subsequent toe will be slightly smaller than the last.
That will do it for the toes and the final detail will add some slight curves underneath the foot as shown in our reference image.
Then you are ready to move on to the coloring phase of your drawing!
Before doing so, feel free to add any details of your own that you’d like. One thing you can do is reverse all the pictures in this tutorial so you can draw a matching foot!
You can also remove a few details to make it look like a footprint in the sand. These are just a few ideas, but how many more can you think of to complete this footwork?
Step 6 – Complete your leg drawing with some colors
Now that you’ve finished your leg drawing, you can now have fun adding some color to it!
You have a lot of options to choose from in terms of how you color. You can try matching your own skin tone with color tools to make it look like your feet, to get an idea.
You can also create a more stylish look and use some vibrant and bright colors to complete it.
Another idea is to draw a tattoo design on the foot!
These are some of the many approaches you can take, so get creative and show us what you can do!
You can also have fun with a selection of art media, from paints like acrylic and watercolors to others like crayons, pencils, and markers.
There’s no wrong way to color, so let your creativity flow!
Your leg drawing is done!
You’ve made it to the end of our step-by-step guide on how to draw feet and you’ll be so proud of it!
If you follow the steps in this tutorial, try your best and take it slow, we’re sure you’ll find that drawing a foot can be as easy as counting toes! We also really hope that you had a lot of fun working with us in this guide.
Now you can get creative with it and personalize your footwork with some extra details, background or with the amazing colors and art media you use!
The possibilities are endless and we can’t wait to see what you do.
We have lots of great drawing tutorials on our site and we hope you’ll visit us there for more fun! We’re also always uploading new tutorials, so be sure to check back often!
