How to draw the female figure with this how-to video and step-by-step drawing instructions. Easy drawing tutorial for beginners and everyone.
Please see the drawing tutorial in the video below
You can refer to the simple step-by-step drawing guide below
Step 1
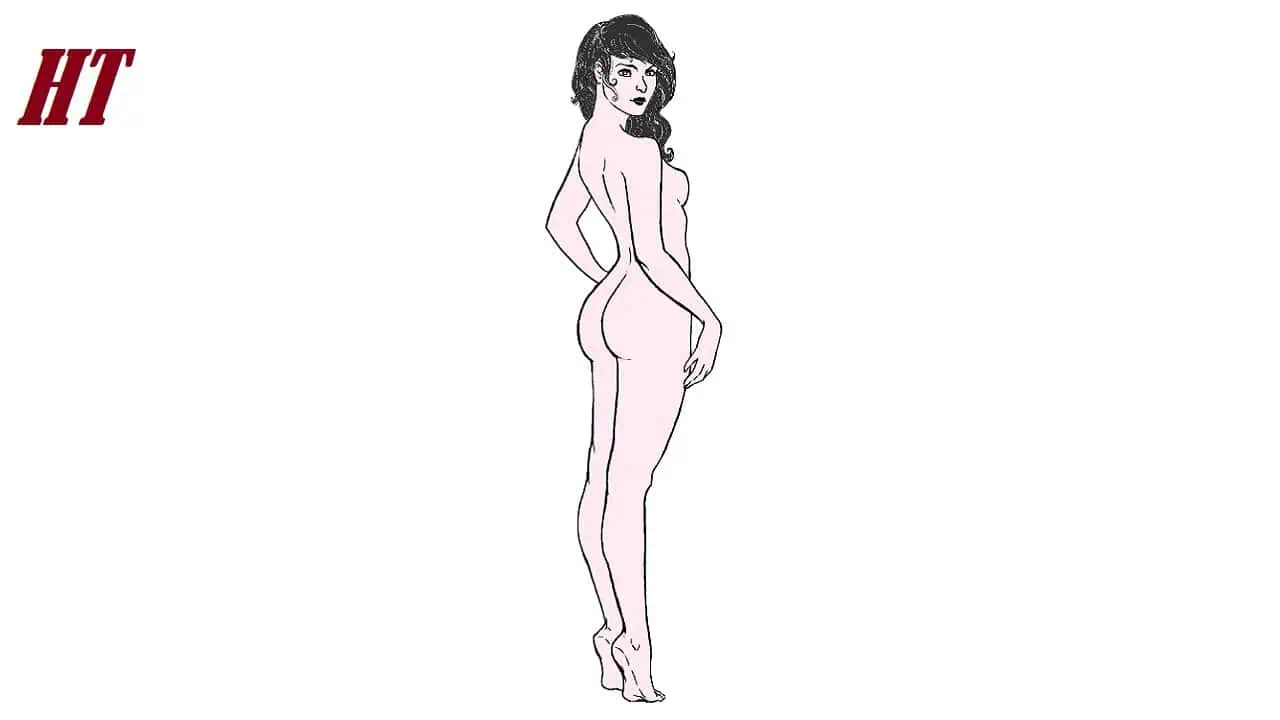
Okay, the first step of almost any female character should be the most important. It’s the part of the female body that sets it apart from the male body more than anything else. Of course, this is the curve. The “S” curve of a woman’s body should be quite prominent in showing her posture and figure. It gives your character a gentle feminine quality that you really want to show. From the head down, we go from the curve of the neck, shoulders, lower back, buttocks, back of thighs, back of calves, heels and toes. If you don’t immediately see what the curve of the figure is, a great way to practice curves is to find pictures of women posing and draw curves on the photo. It’s great practice! This will give you the eye you need to draw your own figure.
Step 2
Now, the next step is to fill in the shapes. Start with the upper back. You want to give every shape a cube with the corners of each block emphasizing the “bones” of the shape. These skeletal landmarks are the main shapes in the human figure that you should make sure to display to give your drawing a more UMPH! Examples include shoulder blades, hips, ribs, and ankles. Tip: Make sure that the elbow in your picture is not lower than you think it is and the bottom of the hand (when the arm is flat on the picture) is not lowered too much. half thigh.
Step 3
Ok, now draw the shape of the legs and feet. Give the thighs and calves a slight curve outward and the calves inward. (emphasis again that “S” Curve, that’s the motif that runs through all female figures) One thing I always keep in mind when drawing feet (As I know they are difficult to draw) Think of them as a wedge at the bottom of the foot. ankle. If you practice with drawing and folding that wedge, you’ll eventually be able to add in the toes and heels. That really helped me get used to portraiture.
Step 4
Ready for the last fun part? Now you can add facial details. Make sure the eye sits between the construction lines. Make sure they are one eye apart. The top of the right ear should touch the upper eye construction line, and the bottom of the right ear should be at the bottom of the nose. The nose should be between the eyes to the bottom of the chin. Lips should be between the nose and chin. Hair (My personal favorite) should be left loose and fun! (I like long and wavy hair) Make sure you take into account not only the shape and length of your hair, but also how it falls over your shoulders and where the light hits it. When making this figure, feel free to experiment with different hairstyles! This is your chance to try something new out! Don’t be afraid to skip my tutorial and do something crazy and fun!
Step 5
Ok, now outline the upper body. It’s all very loose, but we’ll tighten it up as we go on. During the sketching phase, don’t be afraid to emphasize too much. If you think it looks weird, you can always delete it, but here are the steps to have fun and experiment. Again, don’t forget the skeleton landmarks! Ribs, hips and shoulder blades. This is also where you add the fingers. I gave him a very simple comfort hand. You don’t want to shake her hand and do anything crazy because you want her to be poised and you don’t want her attention.
Step 6
Now draw the legs and feet. Again, don’t be afraid to experiment with crazy curves and extra-large sizes. This is you also add to the foot. Make sure you show the instep, because she has her back to us. You also won’t be able to see all of the toes, maybe one or two. Also, make sure to show the ankle bone landmark.
Step 7
Ok, Clear all your build lines and see where your numbers are! Looks pretty good, doesn’t it? This is the step where you can add or subtract any lines that may be slightly wrong. Maybe add your own flame? Edit the face and hair a bit. Sketch a few more details before adding to the final line.
Step 8
You can now add the final clean line to your sketches. Bring in all the details and clean the lines and really add character to the face. hair, hands and feet. Don’t forget things like ear detail, fine lines and wrinkles (not so much if it’s a young woman)
Step 9
Alright! Now erase your sketchy lines to reveal the masterpiece underneath! Now you can add in any details you may have missed and clean up anything that still looks a bit sketchy. But overall, it’s all done! Now you can go directly to colors. Thank you so much for checking out my first tutorial. Comments and reviews are always welcome! Any questions, just post those too! If anyone tries out this tutorial I would LOVE to see what you do with it! Please post up your drawings so I can see them!
You can see more:
How to draw a beautiful anime girl
How to Draw a Anime Girl full Body Step by Step
Cute Manga Girl Drawing Step by Step
Haerin from K-pop girl group Drawing


