How To Draw Legs easy with this how-to video and step-by-step drawing instructions. Easy drawing tutorial for beginners and kids.
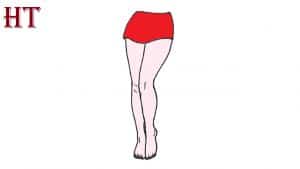
Please see the drawing tutorial in the video below
You can refer to the simple step-by-step drawing guide below
Step 1
As we mentioned in the introduction to this leg tutorial, when working on a new drawing it can be a lot easier to break it down into smaller, more manageable steps.
For this first part, we’re going to draw some pretty simple curves for the top half of the leg.
We will be drawing 3 lines as we do this, and you should try to get these lines to look as close to our reference image as possible.
The lines in the reference image will show you not only what the lines should look like, but also their length in relation to each other.
Finally, add some lines near the end of these lines for the knee detail. Then we can move on to step 2!
Step 2 – Next, draw the shin for the left leg
Now that you’ve finished drawing the top of the legs, we can start drawing the bottom halves in this section.
Now we will focus on the left leg and you can draw it using another curved line extending from the top of the left leg.
It should curve outward near the top, inward lower down, and then slightly out at the bottom at the start of the foot.
Step 3 – Draw the foot and shin details in this section
In this step of the leg tutorial, we will add some more details to the leg on the left.
Use several smaller curves for the five toes connecting to the starting point of the foot you started with in the previous step.
Then don’t forget to add some pedicure details with some little shapes on the tips of the toes!
Then, draw a thin vertical line for the top of the shin to the right of this left leg. There will only be some small line details to add to finish this step and then we can move on to step 4.
Step 4 – Now draw the second and more of the shin
With the corner leg drawing, your second leg drawing will be from a different perspective than the other.
You can draw this second foot against the one you drew in the previous step. The toes look a bit longer due to this change in angle and you can see in the reference image how they look.
Then draw the shin that attaches to the foot and ankle, at the end of this step there will be an extra space to add, which we will cover later!
Step 5 – Next, draw the final details of the legs
This step of our leg tutorial will include finishing off the final details and elements before the final step. You’ll also be able to add some of your own a little bit, but we’ll do it!
For now, we’ll end up closing the free space we mentioned earlier. You can fill in this by drawing another line that curves slightly outward, as shown in the reference image. Your leg drawing is done!
Before moving on to the final step, you can also add your own details. There are so many ideas that you can work on, and we can go over a few of them right now!
You can draw some pants or other clothing on the legs, or you can draw more of the body part to which these legs are attached.
You can also add background and other elements, but there are more details that you can see more! What can you think to end this picture?
Step 6 – Complete your leg drawing with some colors
In the final part of your footwork, we’ll finish with some color. We’ve already shown you one way you can color your pictures, but this is where you can take over and express your creativity!
There are tons of options for different skin tones you can choose from, and if you’ve painted any more details or backgrounds they’re great options for adding even more color variations. .
You can then decide on the art mediums and tools that you will use! Will you choose paint mediums, crayons and pencils, or a combination of your favorite mediums?
Your leg drawing is done!
We mentioned at the beginning of this tutorial on how to draw legs that drawing any part of the human body can be quite challenging.
We hope that this tutorial made recreating these legs an easy and fun way! We aim to make it simpler and less frustrating by breaking it down into smaller steps, so hopefully we’ve succeeded in this goal for you!
We will now look forward to seeing how you take this drawing further with your own details and elements. Be sure to have fun and be creative as you finish this painting in style!
Then, when you are ready to learn more, you can visit our website to enjoy our many great free drawing tutorials. This list of tutorials is constantly growing, so be sure to keep subscribing!
Once your footwork is done, be sure to share it on our Facebook and Pinterest pages so we can enjoy your creation!

